Writing these posts have reminded me of all the horrors I’ve seen in buildings and homes. Unfortunately, some have been in my own house! This is one of those (unfortunate) cases.
This all happened some years before I got into the building science business, so I didn’t know the warning signs to look for, and it cost me dearly!
Not long after I moved into my home, we started hearing loud “settling cracks” coming from our kitchen, which has an attached sunroom. For a long time, we didn’t think much of it. The house was built in 1957 and had gone through various renovations before we moved in, so we just attributed it to natural
Then strange things started happening. A large crack appeared in one section of the wall and floor tiles in the sunroom were breaking. However, this time, we attributed it to poor installation. Contractors echoed this sentiment, so we let it go.
Finally, in the middle of winter, after a particularly loud *CRACK* coming from the kitchen, I went to explore. It was then I noticed a blackening on the wall behind the kitchen table. I thought “mold”, and went to explore. Like any guy, I poked at it with my finger. Unfortunately, my finger went right through the wall! This was the start of a long night…
As I continued to poke at the wall, I discovered that the entire short wall, on which the prefab sunroom was installed, was rotten. This must have been going on for years because almost all the 2×4 wall studs had turned to mud – completely rotten. Argh!
By the end of the night, I had removed most of the floor tiles and all the rotten wall parts and found pressure-treated lumber to support the sunroom. Frankly, I was surprised that the entire sunroom hadn’t fallen down – it was that bad.
So What Happened?
What I discovered during the deconstruction was that all the materials were wet. This included the exterior walls and the subfloor under the tiles, which by now had rotted out too.
The following day, after I’d warned my wife not to set foot in the sunroom and start getting bids on rebuilding the kitchen, I went outside and studied the stone wall on which the sunroom was built. I also looked from the inside to see if I could find the source of the water. In fact, it was quite easy to find – I could see daylight through the wall! Further inspection showed that the builders were depending on caulk to water-seal the structure. This is a common cause of leaks.
Sidebar – Rant about Caulk
Folks, caulk is never to be used, especially on the outside of a house, as the primary line of defense against water leaks. If you use caulk, it will eventually give way and lead to a leak. I guarantee this. No matter what any contractor, brother-in-law or best buddy tells you. Caulk should not be used this way.
Think about it. You’ve got two different materials – in my case, an aluminum sunroom sitting on a stone wall. The massive stone wall changes size very little as it warms and cools while the aluminum changes dimensions considerably. In technical terms, the “coefficient of linear expansion” of aluminum is high compared to that of sandstone. If you want numbers, it’s double. And caulk? That expands and contracts ten times as much as metal and stone!
What that means is that if you go from 0F in the winter, to 100F in the summer (higher if the sun is shining on it), over the 8ft length of the sunroom, the aluminum will expand between one and two millimeters more than the stone and the caulk wants to change length by about an inch. If this happens repeatedly, and you combine these forces with the shrinkage of the caulk over time, the result is a guaranteed leak.
So if you’re considering using caulk in this way – don’t do it. Fixing the damaged caused by that $3.49 tube of caulk will cost you tens of thousands of dollars.
Back to the Leak…
 What else did the builder do wrong? Well, they ignored a piece of information that any grade-schooler could tell you – water runs down hill and puddles on flat spots. Why do builders think that they can ignore the laws of physics?
In this case, they built the sunroom on a flat topped stone wall. So when it snowed or rained, the water would sit on the wall – the only water barrier being a little bead of caulk. Not to mention that SANDSTONE IS WATER PERMEABLE, so any water that sits on it can wick around the caulk and enter the house.
The solution is relatively simple. Slope the top surface so that water flows away from the house – yes folks, water runs down hill. Use this to your advantage.
There’s No Such Thing as a Small Leak
This leak, caused by poor design and improper use of caulk, went unnoticed for a decade until my sunroom almost fell down. I won’t tell you how much it cost to fix it right. But it was such a painful learning experience. In fact, I’m here writing this today largely because of what I learned. Unfortunately, one of the most important things I learned is that some builders ignore the science of building and instead just focus on cosmetics. Remember, you cannot win the fight against physics!
What other problems can arise due to “small” leaks? Well, have you ever had a slow drip somewhere that you didn’t fix? You know, one of those leaks that maybe you just put a bucket underneath so that it wouldn’t stain your carpet?
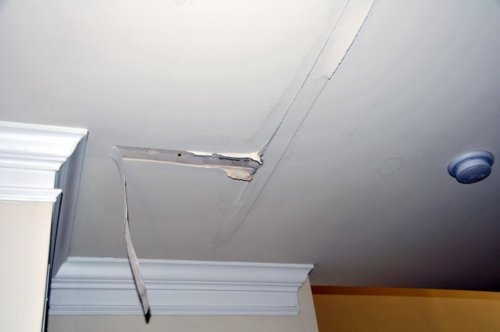
Well, if you did that, you risked having your house collapse. Maybe not all at once, but it starts with a slow drip. Who knows where the drip started. Perhaps it was running down from the roof, working its way down a rafter, dripping on the attic floor, migrating down a wall, puddling on the ceiling, then finally dripping on your floor.
Every area that is subject to repeated wetting like this might, over time, get moldy then get eaten by termites or mold-related products. I’ve seen support timbers that became so soft I could poke my finger through them. Do you want this holding up your house? What happens during the next big snowfall or wind storm that puts pressure on your home? Seriously – this is life threatening stuff!
So if you ever discover a “small” leak, don’t wait till next month, or next year to have it fixed. Immediately, try to find the source of the leak. If it’s a leaky pipe, shut off the water to that pipe and have it fixed. If it’s a leaky roof, get it fixed correctly. Whatever the case, you need to dry out all the building materials, preferably with fans and dehumidifiers, as soon as you can, and get a professional in there to fix it.
A note about mold: some people have sensitivities to mold, others don’t. If you have moldy conditions, you have to deal with the source of the water, or the mold will keep coming back. But whatever you do, if you have any concerns, call in a mold remediation specialist. I can’t stress this enough – a specialist! Not your buddy who does carpentry on the side. Probably not your builder. A specialist who knows how to safely get rid of the mold and prevent it from coming back.


 Let’s look at this. This system was basically leaving the faucet on for 8-16 hours per day, using 50-100 gallons of hot water just to put a few gallons of moisture into the air. What a horrible waste!
 An improperly vented bath fan can lead to tens of thousands of dollars of damage to your home and even create a health risk. How? *Moisture!*
