I received an excellent question today, in a nutshell it was: “Why is my house so humid that condensation is dripping from the ceiling?”
The questioner reminded me of all the times I’ve heard this question, both on this blog and when I was in the field, helping track down issues in people’s homes. Clearly this is serious issue that needs more attention because it leads to problems with a home’s health, comfort and efficiency – exactly the things I focus on! (I also wrote extensively on this in a previous article: “Cathedral Ceilings – Mold and Moisture”)
Tongue and groove ceilings – they’re beautiful, but like many beautiful things, they can be problematic.
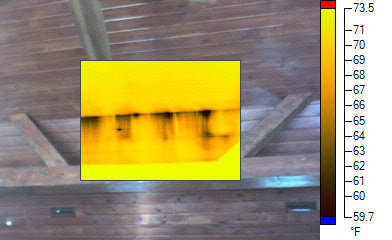
(Photo shows a thermal scan of a ceiling where cold air is leaking in through the gaps – those are the black streaks down the photo)
Unfortunately, T&G ceilings have become the single most discussed items on Ted’s Energy Tips due to their overwhelming tendency to be associated with water, mold, or moisture problems.
Does your ceiling drip water?
I’ve probably heard this a hundred times – “Help! Water is leaking from my ceiling! We had a cold snap and now it’s a beautiful day and now it’s raining in my house!” The caller/writer then tells me that the roofer came out to check for leaks and couldn’t find anything. If they took it a step further, someone pulled off some of the ceiling planks, saw the real problem (condensation) and told them that they need to ventilate the ceilings. If they’re unlucky, they spent thousands of dollars, added ventilation, and the water problems became worse!
Why do ceilings drip when there’s no leak?
Boil a pot of water with a lid on it. Wait a minute then lift the lid. What do you see? Lots of water on the underside of the lid. There’s no ‘leak’ but yet the lid is covered with water due to condensation forming on it. This is exactly what’s happening inside your ceiling. Under the right conditions, when water vapor in the air comes in contact with a surface cooler than the air, the water vapor becomes liquid water. If this happens enough, the water builds up and forms large drop of water. Those get large enough and, PLOP!, it starts raining in your house!
All too often, a T&G ceiling is constructed in a way that virtually guarantees water problems. The roof is installed over the rafters. Fiberglass is shoved between the rafters. T&G boards are nailed to the rafters. Bingo – you get mold, water “leaks”, and thousands of dollars of repairs which probably don’t even fix the problem.
Why don’t normal ceilings drip?
A typical ceiling is made of sheetrock or plaster, and all the seams are carefully filled in. That’s then painted, usually with several coats of paint. While some tiny amount of water vapor can get through the paint and sheetrock, it’s a very small quantity. Small enough that, under normal conditions, natural air flow and moisture transfer removes the moisture that does get into the ceiling cavity above the sheetrock.
However, even these ceilings often have problems when holes are cut in them for recessed lights. This allows that air and moisture to move much more quickly into the ceiling where it can condense and lead to mold growth and wood rot. The key fact – if air gets into your ceiling, even through small holes, it will carry water vapor with it which is very likely to lead to moisture problems.
Why are T&G ceilings so bad?
Water vapor is tiny. Really, really tiny. So tiny, that even the smallest crack is billions and billions of times larger than the water molecule. Tongue and groove ceilings may look ‘tight’ but to a water molecule, it’s like a wide open door! So that water vapor simply flows right up through those cracks and into the ceiling cavity above.
To Make matters worse, most ceilings are stuffed with fiberglass insulation, which doesn’t stop the water vapor at all. So the vapor keeps wafting up past the insulation until it reaches the underside of your roof. That roof deck is cold in the winter and on clear nights. When the vapor hits it, it condenses into liquid water. This is when the real problems start…
When it’s below freezing, the water freezes into ice. More water vapor enters, contacts the ice, and adds to the ice. Before you know it, the entire underside of the roof and anything else cold enough in the ceiling cavity, is covered with a layer of ice. This could go on for days, weeks or even months until the ice melts and it starts raining in your living room!
Even when it’s not below freezing, in most climates, it gets cold enough and there’s enough water vapor carried by the air for condensation to form inside the ceiling. The wood can absorb some of that moisture and slowly transfer it out. But with a T&G ceiling, the water supply inside the house is nearly infinite, so it keeps building up. Pretty soon, the wood is saturated and larger water droplets form. They’ll drip down, following gravity, until they find a place to leak out. That’s why the drips often form far away from where the condensation is actually occurring, which is often high up the ceiling.
Will ventilation solve the problem?
Builders are taught that roofs have to be ventilated in order to ‘flush out’ the moisture. The problem is, that doesn’t work with T&G ceilings. In fact, it often makes problems worse.
Why? As the air moves through the cavity, it has a tendency to draw more air from the inside of the house into the cavity. Some of that is flushed out with the air moving through the cavity. But when the water vapor carried by the air comes in contact with cold surfaces, it basically sticks. If there’s enough, which there usually is in a house during winter, then you still have the condensation problem.
How do you prevent water vapor from getting in the ceiling?
Take a step back. What ceilings work properly? We started discussing how a typical drywall ceiling usually doesn’t have moisture problems like these (unless you put holes in it). So the easiest solution is to build a normal drywall ceiling over which you install the T&G boards – purely for aesthetic purposes. Drywall is cheap. Replacing your roof is expensive.
What about plastic sheeting?
Drywall is cheap. Replacing your roof is expensive. Some builders try to ‘cheap out’ by just putting plastic up, usually with thousands of staples, then nailing the T&G boards to the rafters, with thousands more nails. Do you think a sheet of plastic with thousands of holes in it is going to stop the movement of water vapor, one of the tiniest molecules in nature, from getting into the ceiling? Maybe it will take 5 years to rot out the roof instead of 3. But eventually, you’re going to be spending many thousands of dollars for a new roof, just because the builder decided to take the cheap approach and save a little bit of drywall.
Ok, Ted, how would you build a T&G ceiling?
Lots of foam insulation. Works great!
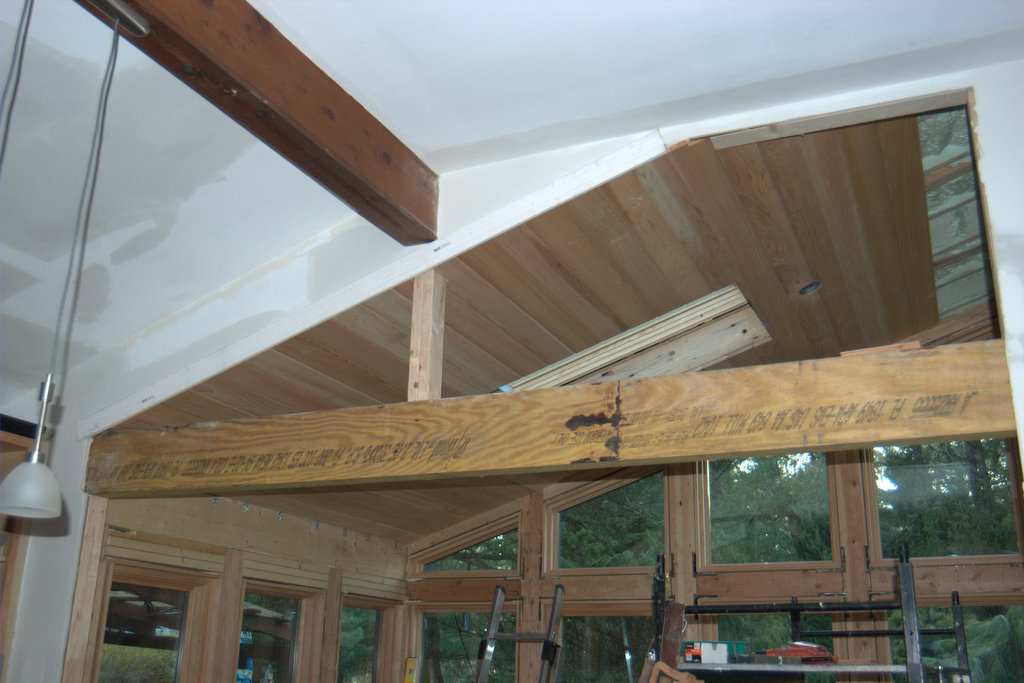
Glad you asked. Here’s how I did it when we replaced our sunroom. We used high density spray foam. The foam completely fills the rafter bays, as in the photo above. Any remaining cracks are caulked. Then we installed the T&G ceiling to the rafters, like in the photo below:
Adding the T&G ceiling. No vapor barrier required with closed cell polyurethane.
We’ve had this ceiling for more than 10 years now with zero issues. It’s on the kitchen which gets humid from cooking, but still, no problems.
Would you do it differently if you did it again?
Good question! I might add a thin sheet of foil faced polyiso sheet foam across the rafters before installing the T&G ceiling to add another layer of moisture barrier and to reduce thermal bridging through the wooden rafters. In extremely cold climates, this would be highly recommended as you could still get condensation on the exposed rafters because they transmit the cold much more than the insulation. But in eastern PA where I live, it’s not cold enough to warrant that extra work for the minimal gain given this construction.
I already installed my ceiling, can I seal the wood or the seams?
In a word – no. That might slow the process slightly, but eventually you’re going to regret the decision when your roof rots out and your ceiling is filled with mold. Shortcuts don’t work with T&G ceilings. You have to do them right, or you’ll pay the price eventually.
Can I install recessed lights in a T&G ceiling?
If you’ve read much on this, or any other energy efficiency and building science website, you’ll know that recessed lights are nightmares. Yes, they look clean and some are even rated ‘air tight’, but those ratings are BS. They are filled with holes which let ample moisture through. That moisture will go into your ceiling and cause the same issues.
The compromise I’ll make is if you do a full foam job like I did and then install low-profile LED lights that don’t require reducing the insulation. Since the T&G ceiling isn’t an air barrier anyway, cutting holes in it to mount these lights doesn’t matter. The low profile LED lights look just like normal recessed lights but they don’t protrude into the ceiling cavity. Here’s an example of a ‘canless’ recessed light at Home Depot.
I recently received this question on Quora and decided to share the answer with readers there as well as on TedsTips. I hope this will save some of you from heartbreak after your winter vacation!
A primary consideration in cold climates is pipes freezing. It is very important to realize that pipes can freeze even if the home temperature is above freezing due to the locations of the pipes. I once owned a townhouse where the pipes would freeze when the outside temperatures dipped into the single digits outside, even though we were warm inside the house. How? The pipes ran up through an inside wall, across the ceiling and over to an outside wall spigot. The inside wall, at the top, opened to the cold attic, so that cold air would get into the wall cavity and freeze the pipes. This was fixed by air sealing the top of that wall cavity, but required considerable detective work to figure out. The pipes running through the outer wall down to the spigot would freeze near the spigot where the pipes were exposed to cold temperature, so this run had to be isolated from the rest of the house plumbing and drained during the winter.
These are two examples, that show potential issues that are made worse by turning down the temperature while you are away. Imagine the situation where the pipes don’t freeze when the house is occupied and the walls are warm enough to keep the pipes from freezing. Now, imagine reducing the indoor temperature, maybe only a few degrees, but enough that the cold from the outside overwhelms the meager heat coming from the house that is able to reach the pipes. This has bitten many a homeowner during winter absences.
Unfortunately, there is really no way of knowing if this will happen until it happens. This is why it is critical that you turn off the main water valve for the water supply to your spigots in your house when you travel*. The pipes may still burst, but at least your house won’t flood. When you return after winter and turn the water back on, you’ll know quickly that there’s a leak and can turn off the water and fix the leak before catastrophic damage is done. This is no exaggeration – I was called into a home that was literally FILLED with mold and had to be gutted. A pipe had burst and the owner returned after a month to find the house completely flooded.
*I was reminded (see comment below article) that you MUST NOT turn off the make-up water supply if you have a boiler for heating your home. This is very important. Boilers need available water to maintain system pressure in your radiators etc. Without make-up water, the pressure in the system can drop and the system will stop functioning.
If you plan on leaving your home for an extended period, it is always a good idea to have your HVAC company give the heating system a once-over to ensure that it is in good working order. While there, they can advise you on which water valve you can safely turn off and which you should not touch. It would be advisable to label all the valves for future reference.
Flooding is the most damaging effect, but there’s another, more insidious issue that can arise during winter house shutdowns – condensation damage and mold.
Condensation can lead to mold and wood rot
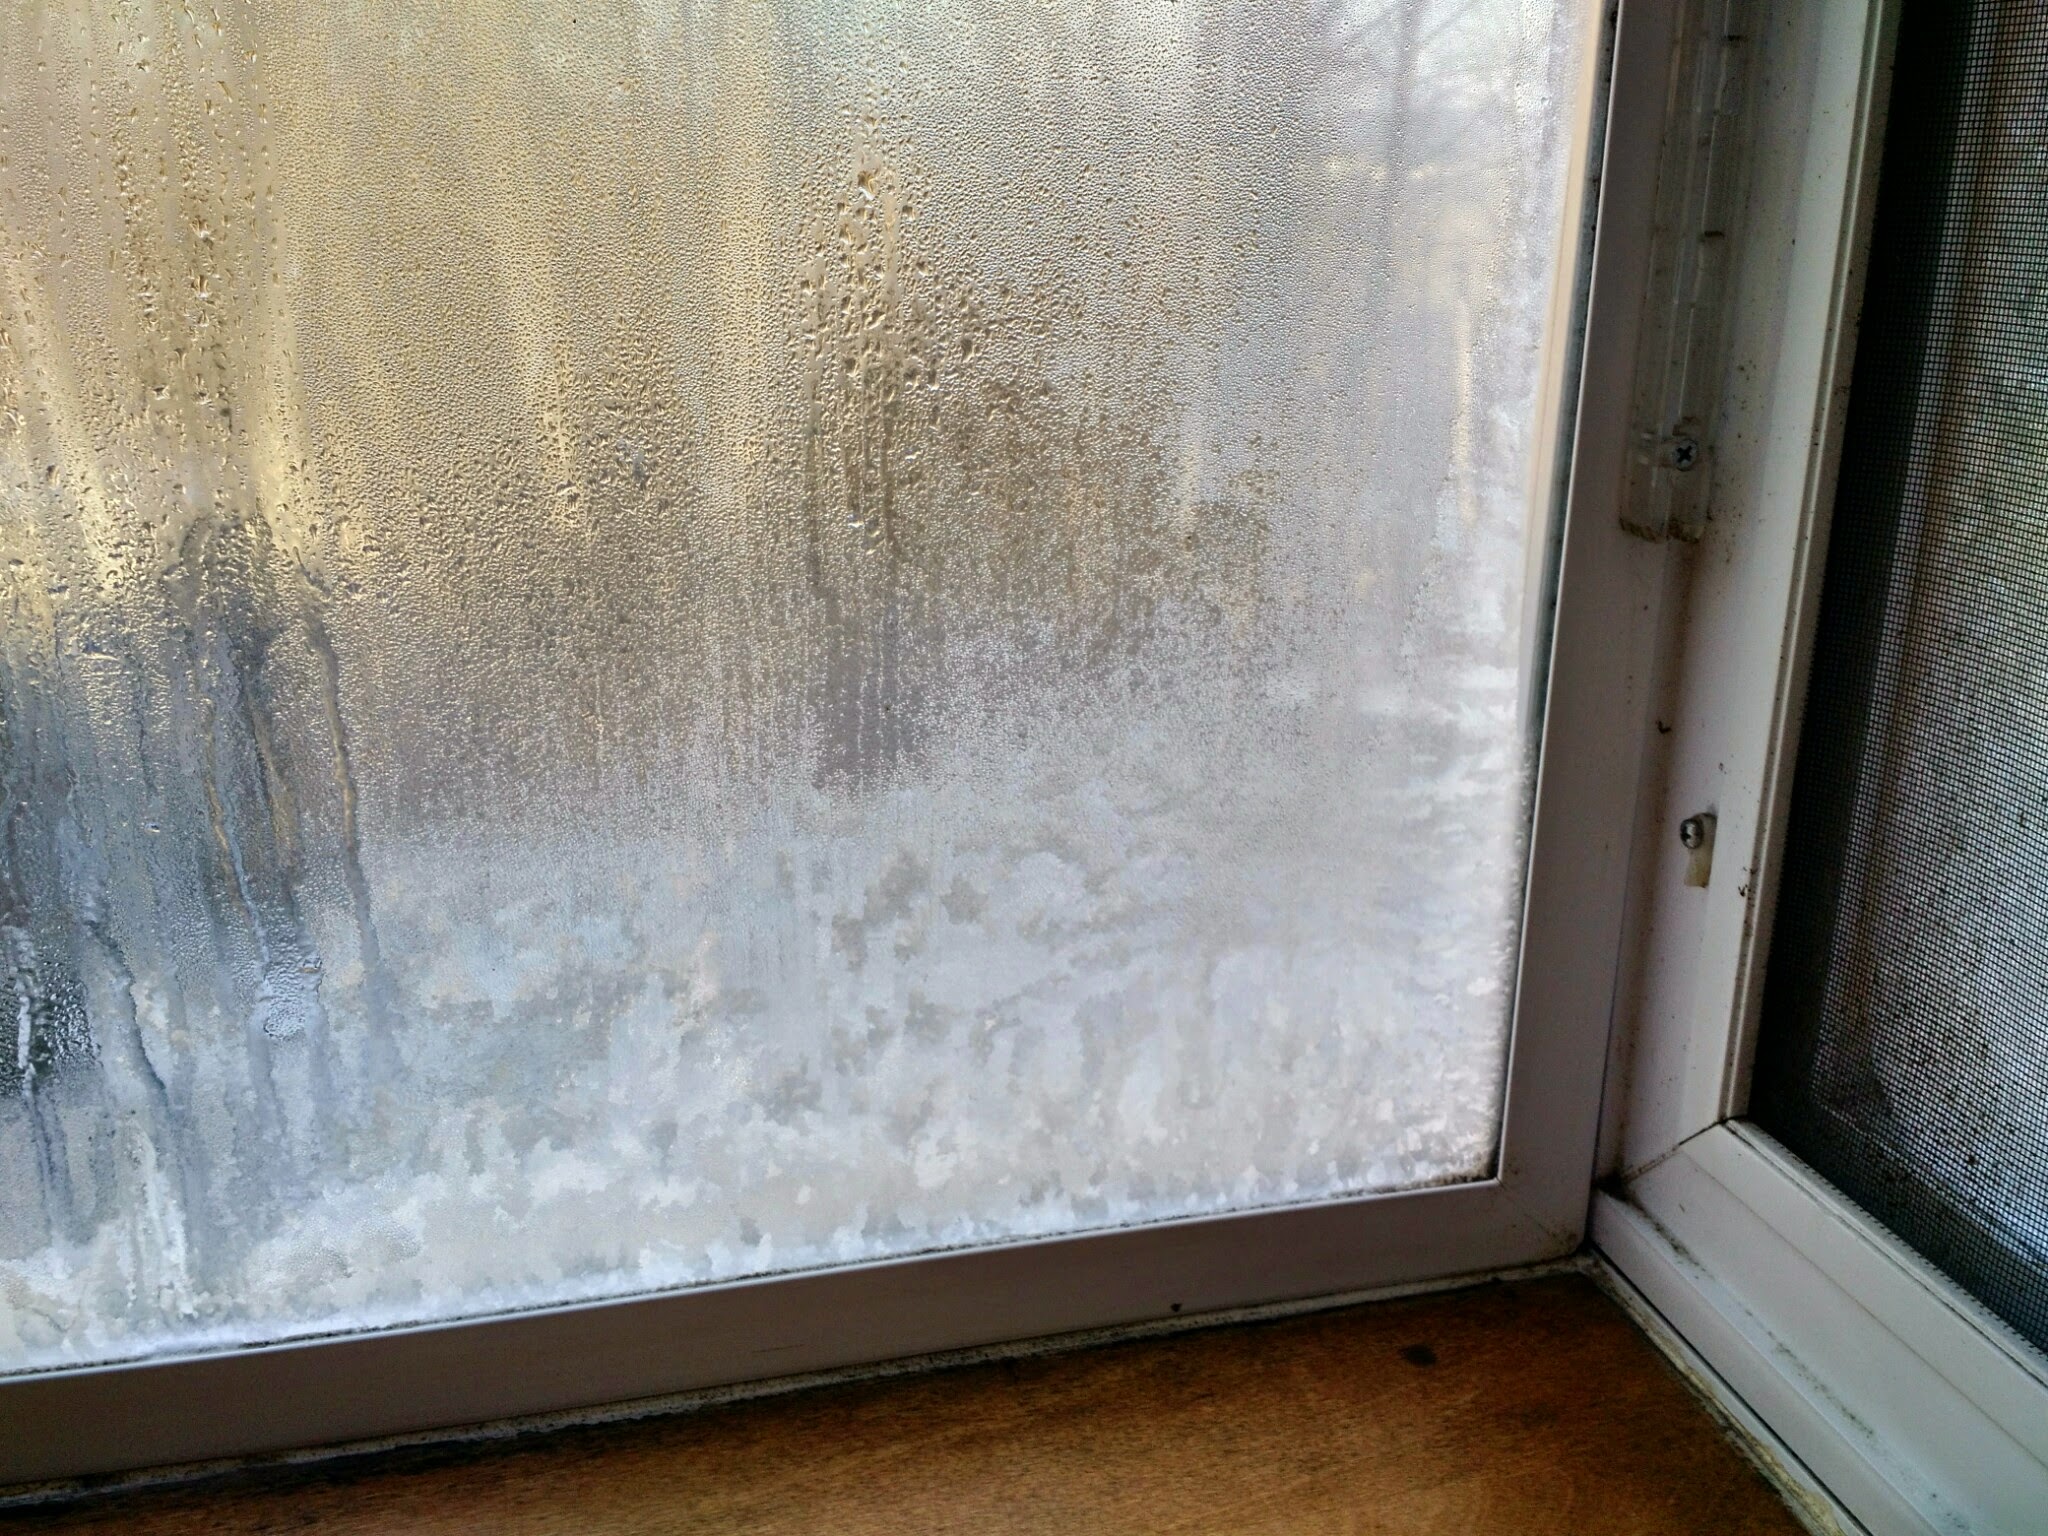
In order to understand this, I have to touch on the physics of condensation. Condensation is the conversion of water vapor to liquid water that occurs at or below what is called the “dew point.” At normal temperatures (say 70F), condensation rarely occurs during the winter because the home humidity level is modest and most of the inside of the home is above the dew point. However, even with typical indoor humidity levels, you can experience condensation on windows, because windows get much colder than the insulated walls of the house. You might have noticed this if you have curtains or insulating blinds. These help keep your room warmer but allow the windows to get even colder because they intentionally reduce the windows sapping heat from the room. When you open the curtains, you might find the windows soaking wet from all the condensation. Worse, the wood around the window, especially at the bottom edge, might be saturated with water.
Under normal circumstances, you would see this in the morning and could dry off the wood and allow it to warm up when you open the curtains. But when you are away, even if you don’t turn down the thermostat, the water will remain and can get worse every day. Over time, this will likely lead to mold growth and if allowed long enough will rot out the wood. For this reason, I highly recommend that people leave their curtains and insulating shades “UP” or “OPEN” when they are away for extended periods. You want to minimize the chance of condensation buildup and the associated potential for mold and wood rot.
Let’s continue this thought experiment. If you turn down the thermostat enough, the inner surfaces of your house (walls etc.) can get to a temperature below the dew point and, just like those windows, the water vapor in the air can condense on those surfaces. Many people have made this mistake and come home to a horrible, moldy mess! For this reason, it is extremely important to do two things:
1 – do not turn down the heat excessively. It’s impossible to tell exactly what temperature is too low, but in most climates, people find 55F-60F is safest.
2 – make sure you don’t add any moisture to the air while you are gone. This can be disastrous. For example, many homes have central humidifiers built right into the heaters. If you leave this one it raises the humidity level inside the house every time the furnace runs, likely leading to moisture problems. Turn off all humidifiers before you leave!
Even if you don’t have humidifiers, natural ground moisture can seep into the house through the basement, crawlspaces, etc. This is especially common in homes with dirt floors underneath. Water vapor rises up into the house, driving up the humidity. If you live in such a home, it is really important that you monitor the humidity levels in the home to ensure that they are not too high. During winter, indoor humidity levels will naturally be low, typically less than 50% relative humidity. Humidity levels above 70% are considered too high as they promote mold growth. Get yourself a humidity monitor (they’re cheap on Amazon) and see what humidity levels are. Or better yet, get an Internet smart thermostat.
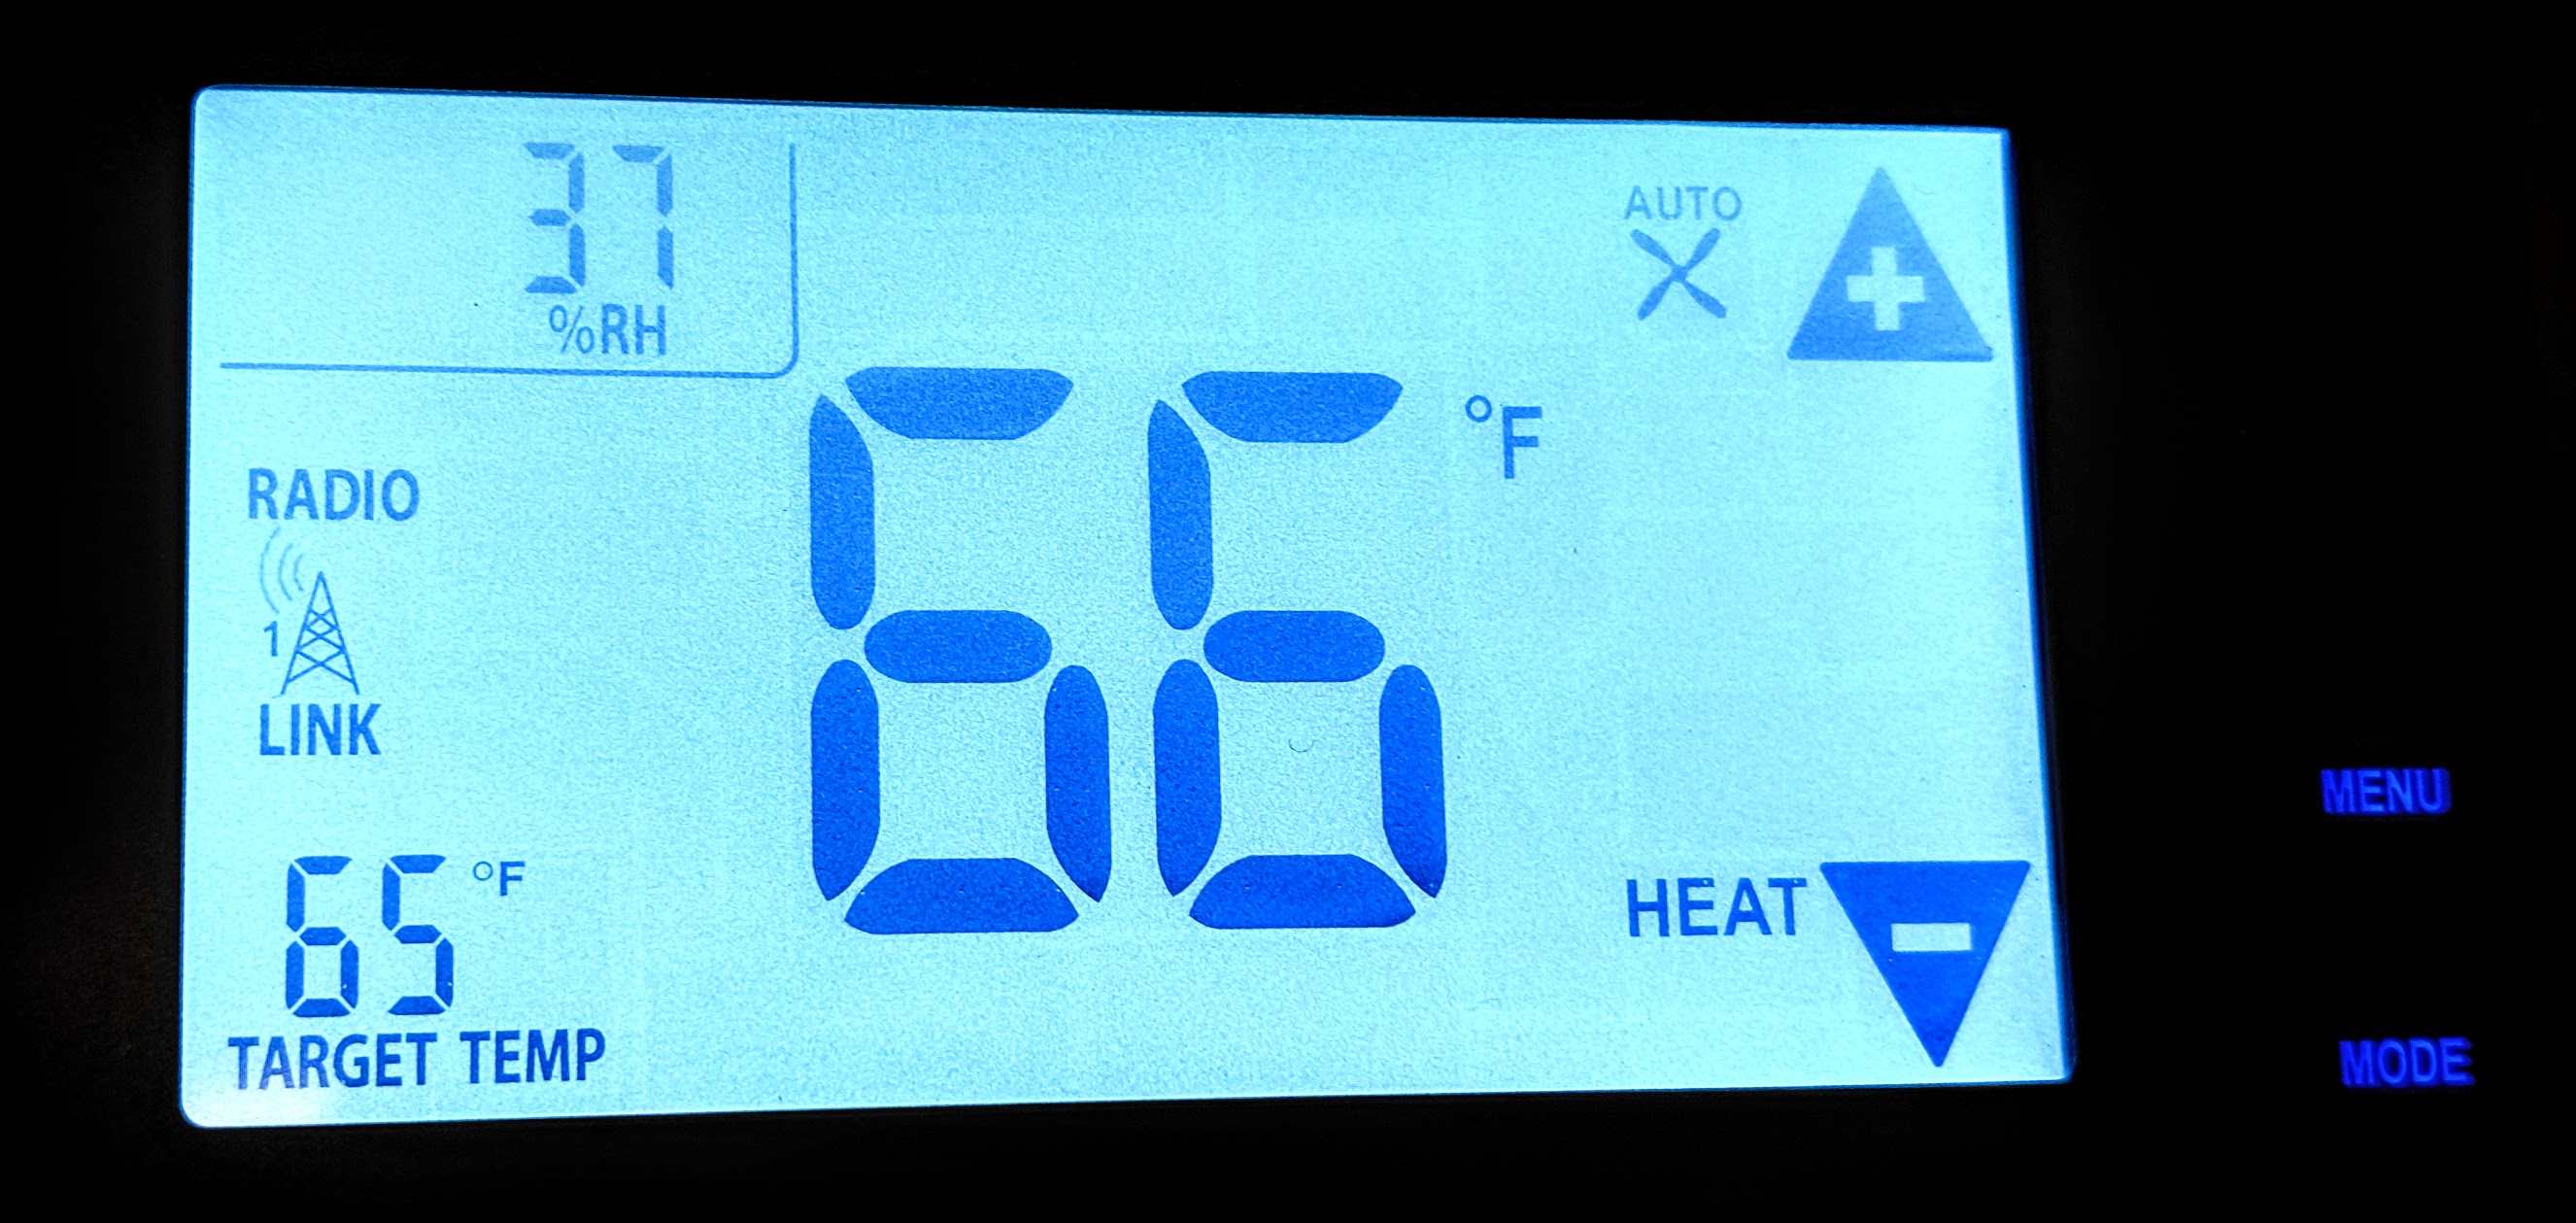
Get an Internet connected thermostat that monitors temperature and humidity
These let you to monitor indoor temperature and humidity levels while you are gone. These are affordable nowadays, and can give you tremendous peace of mind. A quick daily check on temperature and humidity gives you a read on the health of your home. It’s not a guarantee, as you still might have condensation problems, but at least you can be sure that the general climate inside your home is reasonable. It will also tell you that your heating system is working. If the temperature suddenly drops to 45 even though your thermostat is set to 55, you know there’s a problem and can call in help.
Have a wonderful winter. Hopefully you will avoid the main pitfalls that have hit too many other people. A few easy steps can greatly improve your odds of coming back to a healthy home!
One of the hottest topics in energy efficiency and building science is “how should you insulate your attic?” Why? Simply put, the attic has more impact on your efficiency and comfort than any other single part of your home!
Let’s summarize why the attic is so important:
The attic is the hottest part of the house in the summer and is cold in the winter
Hot air rises up to the attic / cold falls drops into the living space
Moisture rises and accumulates in the attic
Central heating/AC systems and ductwork are often in the attic
I was recently sent this excellent set of references on mold. The very mention of mold sends shivers up people’s spines and makes them start sniffling, worrying about adverse effects. These references help to answer your questions and learn how to deal with your mold problems.
Special thanks to the author of the first reference, Patricia Lawson, Research Coordinator with the National Contractors Association of America, for providing these important documents and links.
Humidity. Moisture. Water vapor. Evaporation. Condensation. Mold. Rot.
These are all words that go together in people’s minds when the topic of humidity comes up. But what is it and why is it so important?
I’m going to try to explain this as simply as possible, so for the scientists and engineers reading – please cut me a little slack. I’m going for clarity over precision. However, if you catch the inevitable factual errors, please point them out so I can correct them.
Crawlspaces – those nasty, damp, moldy spaces under your home that you dread entering. They’re one of the least understood parts of a home and the source of countless problems. In this post, I’ll review some of the worst problems and how to avoid them.
Crawlspaces often have two big issues:
Water / moisture – leading to mold and wood rot
Cold / drafty – leading to uncomfortable conditions and wasted energy
Now that you’ve survived a storm, the water has receded and you’ve got your power back, what next? In all likelihood, you’re probably dealing with a wet rug or carpeting and dreading the idea of tearing it all up and throwing it away. But do you really need to do this? The answer is, “it depends.”
If your flood was caused by a stream or river, chances are you’ve got mounds of mud in your basement. While this silt may be great for growing crops, it’s really bad for carpets and the amount of money you’d have to spend cleaning up is probably greater than what it would cost to rip it out and buy it new after your basement has dried out. In addition, there’s a good chance that the water was polluted and maybe smelly, so you probably want to get it out of your home ASAP!
On the other hand, if the water was relatively clean, and your house doesn’t yet smell like a wet dog, you might be able to salvage the carpet. But it really depends upon the situation.
There’s nothing like a gentle Springtime rain. But Summer often brings us torrential downpours, and along with them, roof leaks, incredible moisture and mold!
A few days ago, we had record rainfalls in Eastern Pennsylvania – five inches of rain in some areas. This fortunately came after an extended dry spell, so the rivers didn’t flood this time. We got really lucky.
These heavy rains often bring high winds, fallen branches and roof damage. Sometimes, they’ll just lead to enough leaking for you to notice. Maybe there’s a discoloration on your ceiling or window jamb. Whatever the sign, please pay attention. Failure to deal with a “small” leak now can lead to thousands or tens of thousands of dollars of damage to your house later. Worse, the accompanying mold can pose a severe health/allergy risk.
When dealing with leaks, you need to take several steps in order to minimize the chance of more serious damage to your home:
In the first installment on attic insulation, I discussed why it can be dangerous to add insulation to your attic without air sealing the attic floor first. Moisture can slip through tiny cracks in the attic floor and lead to rotten roofs. Given this information, we walked through the process of finding and sealing all those insidious air leaks in your attic, some easy, some difficult. But finally, after fixing all these problems, you could lay more insulation down on your attic floor, more confident that doing so wouldn’t lead to a humid, moldy attic.
But what if there’s an easier way?
Whether you’re building a new house or retrofitting an older one, you can make life much easier on yourself by using professionally applied spray foam insulation that air seals and insulates in one shot. There are two ways of doing this, each with their own benefits and disadvantages. We’re going to review both methods. One is spraying foam on the attic floor, instead of using loose fill or batt insulation. The other is spraying foam under the roof deck. Continue reading →