Mini-review: Bosch Ariston 4-Gallon Point-of-use Water Heater

Does it take a long time for hot water to get to your sink? Do you think that it’s wasteful to run the water for a minute or two just to be able to wash your hands? Have you thought about installing a recirculation system for instant hot water? If so, this unit might be for you.

I had all these issues in my kitchen because the kitchen water run is quite a distance from my main water heater. So we just got used to washing our hands in cold water. And if we had to rinse some dishes and some needed hot water, we would turn the hot water on full and wait…and wait…and wait until some hot water came out the faucet. I knew there had to be a better way.

For years I’d researched water recirculation units and found one, the Chillipepper, which people seemed to really like. However, I have granite counters and no convenient place to drill a hole for the power switch. I also have other fixtures on the kitchen water line and I didn’t want my wife to have to remember to push a button and wait for hot water. Finally, because I have long pipe runs from my water heater, this still wouldn’t solve the problem of wasted energy because gallons of hot water would be left in the pipes.

After doing some calculations and determining that any solution using the main water heater would waste several times as much hot water as a point-of-use unit, I broke down and bought one of these mini-water heaters.

Our house has a utility closet in the basement that is directly under the kitchen, so I mounted the unit in there. Plumbing was easy for me, but I’ve done a lot of plumbing work. Most people would need to hire a plumber to install the unit. But because of its size, installation is a snap.

Some people will plumb the cold water intake to the heater from the hot water feed to this part of the house. There’s some logic in this, in that if you need lots of hot water, this heater can provide quick water for hand washing but if you need more water, it flows into the tank and provides you with a much greater supply than this little heater can provide. However this still leads to a lot of wasted energy because you’re leaving all that hot water in the long pipes every time you use a little water to wash your hands.

Instead, I chose to connect it to the cold water supply. My logic was that the kitchen sink really should not be used for long washing sessions. rinse a stubborn dish or wash your hands and that’s it. I also had an ulterior motive – if there was only a few gallons of hot water available, it would force my family to use less hot water. Additionally, our washing machine is on this water circuit, and I prefer washing in cold water but my mother-in-law, who likes to come over and do our laundry (don’t ask!) is old-school, and insists on setting the washer to ‘hot.’ Now she gets the satisfaction of thinking she’s washing in hot, but I know the water heater can only supply a few gallons of hot, so it ends up providing the first few gallons of hot water for the primary rinse, but after that, it can’t keep up with the demand. I consider this a bonus energy saving!

The unit uses normal 110v house current, so you just plug it in a nearby outlet. However, I would recommend a dedicated circuit or one that doesn’t have other heavy loads on it because electric water heaters pull a lot of juice. If the water heater turns on at the same time as you’re toasting some bread, you’ll blow a circuit breaker. So make sure you plug it in an outlet on a circuit that is lightly used.

As far as heaters go, this is an attractive unit. As you can see in the picture, it has a white plastic case. Nothing special, but not just an ugly metal box like most. But really, it goes in a utility closet, so they could have painted it any color they wanted and I wouldn’t have cared!

Does it Work?

The main question is: does it work? The answer is “yes,” up to a point. We can now wash our hands and run the dishwasher (which has it’s own super-water heater built-in). As noted above, it also provides hot water for our front-loader washing machine, but because of its limited capacity (four gallons in this case) it won’t provide a lot of hot water. You can wash for a minute or two before the water runs luke-warm then cold. This can be a plus or a minus depending on your needs. I know some people would find this objectionable. But that’s just the way these things work. They enforce water conservation and force you to change the way you use hot water. If you don’t like this, then a small point-of-use water heater is not for you!

Energy Savings

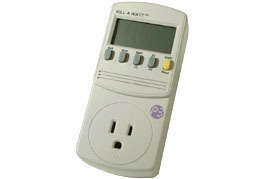
Like all good geeks, I measured the actual electricity use of the water heater. Because it just plugs in an electrical outlet, I plugged it into my kill-a-watt meter, and make daily measurements to see how much energy it is actually using. I’ve been very pleased with the results so far.

Under normal usage – rinsing a few dishes and regular hand washing in the kitchen sink, it consumes 1.5 to 2.0 kWh of electricity per day. This is about 1/3 the electricity that would be required if I used the main electric water heater and just “lost” the heat in the pipes every time I used the sink. On laundry days, this consumption increase by about 2-3 kWh (about 20 gallons of hot water). So we’d still be better off always washing in cold water, but some habits die hard….

Conservatively, I project that for my family, with it’s modest hot water needs, this unit is saving me about 4 kWh per day (about 25 gallons of hot water). That may not sound like much, but over the course of a year, that’s 9,000 gallons of hot water and about 1,400 kWh of electricity. For most people, that’s a full month of electricity saved every year. In my area, that’s a saving of $232! I’ve checked on Amazon.com, and this water heater cost $169 when I wrote this article, so it pretty much pays for itself in the first year if you install it yourself. If you hire a plumber, it may take a couple years to pay off. And, I haven’t included the ecological and financial cost of the water you’re saving.

Addendum – this is not an “on-demand” water heater

To avoid confusion, I should add that this is not an on-demand water heater. On-demand water heaters use much more powerful heating elements to heat water on-the-fly. They provide an infinite supply of hot water because they heat water as needed. The Ariston water heater is just a miniature storage tank water heater. So it’s the same as a conventional water heater, but tiny.

Support my continued work. Buy it here on Amazon.com

Note on my Amazon store

Like any informed consumer, it probably raises red flags when you see someone reviewing an item then potentially profiting from it. I couldn’t agree with you more. For years, I refused to profit from any of the products I’d recommend to my clients for fear of conflict of interest. But then my wife convinced me otherwise. She said “you’re recommending these products because you buy them and believe in them, not because somebody is paying you to do it. How does it compromise your principles by gathering the products you recommend into one convenient place?” How could I argue with that logic?

So now, whenever I find a cool product, most of which I’ve purchased for my own use, I look it up on Amazon. I check the reviews and make sure that the actual seller seems legit and then add it to my “store.”  I don’t really have a real store. It’s just a convenient way of pulling together the products I’ve found and like.

Bright Ideas for Saving Energy #5: Sun Tubes

What’s better than a sunny day? A sunny day that helps illuminate the normally dark recesses of your home!

Normally, people install skylights – basically just windows built into the roof. But skylights have several problems:

  • They’re incredibly energy inefficient. Even a good, double glazed, low-e unit is a poor insulator.
  • If they’re not facing the right direction, they don’t let any direct sunlight in during the winter and too much during the summer.
  • They’re difficult to keep clean unless the roof slope is gentle.
  • They’re prone to leakage due to ice dams created because of heat loss around the windows

A sun tube works differently than a skylight. Instead of being large windows in the roof, they’re typically smaller, about one foot to sixteen inches in diameter. Right away, this is beneficial because energy loss is directly related to the area of the opening. So a 16″ sun tube has an area about one third to one fifth of a typical skylight.

Sun tubes are built with reflectors so that they bring light into the house even as the sun moves to a variety of different locations. Usually, they are set up to reflect the Winter sun optimally but they can work well year round. I’ve installed several in my own home and really like them. One is in my office, which is on the north side of the house and never gets direct sun through the windows. However, the slope of the roof is such that for most of the year, the reflectors on the sun tube can capture sunlight and direct it into the normally gloomy room. Here’s a cheesy video demonstrating how these products work.

During the summer, sun tubes brighten rooms without heating them up like conventional skylights. If you’ve ever stood under a skylight during the summer, you know what a problem this can be. You can get a tan under some skylights! That definitely doesn’t help your air conditioning bill. Solatubes bring in the light, but due to their relatively small size and the way they work, the amount of heat that they bring into this house is very low.

Installation of sun tubes is easy. I installed one  myself, and I’m no carpenter. I just followed the directions and it went in easily. Granted, I am pretty good with a saw and don’t mind crawling around the attic. However, if you’re not up to it, there are usually “factory certified” contractors who have been trained to do the installation.

There are a variety of manufacturers of sun tubes, but my favorite is Solatube. They have residential and commercial versions are well made and easy to install. Please note – I have no business relationship with them. I’m just a happy customer!

Another nice feature of sun tubes is that they can act like light fixtures when you need electrical lighting. A simple bulb holder can be installed into the tube. Yes, it blocks a little of the light, but I’ve found this to be well worth it in the rooms where I’ve installed them.

Are they perfect? No. If you don’t like white, round plastic portholes in your ceiling, you’re out of luck. Additionally, the tubes are fairly cheap and easily damaged if you’re not careful. However, you only handle them during installation, so that’s not a big deal. They also need to be installed in rooms directly below the attic or roof because it’s a sun tube! It only directs light a few feet from the roof into the room. So they’re ideal for ranch houses or upstairs rooms but of no use on the first floor of two or three floor homes.

Other than that, I love these things. There are some rooms in my house where I almost never have to turn on the lights. If I could have, I would have installed several in my kitchen and living room.


Bright Ideas for Saving Energy #4 – Window Dressing

We’ve all heard the hype – buy new windows and save 35% on your next heating bill. To put it politely, that’s a bunch of hooey. Unless your windows are old, poorly installed, leaky and missing half the glass, you are not going to save 35% on your heating bills. In fact, there are numerous studies showing that replacing windows is among the least cost effective measures for improving your home’s energy efficiency!

That said, windows are among the worst performing parts of your home when it comes to energy efficiency. Did you know that a single, 3 by 5 foot window can double the energy loss for the wall in which it’s mounted? This is why manufacturers often make such outrageous claims about energy savings. But a home loses energy through more places than its walls. It loses energy through air infiltration, walls, windows, doors, ceilings, the foundation and the slab.

Let’s compare a variety of window styles and their relative energy loss. But first, a definition:

U-value: is a measure of the energy transfer through a window. The higher the U-value, the greater the energy transfer and the worse the insulating ability of the window.

  1. Single glazed, clear glass, metal frame. U-value is above 1.0. Metal framed windows are the worst since metal conducts heat so well.
  2. Single glazed, clear glass, non-metal frame. U = 0.71 to 0.99
  3. Double glazed, clear glass, metal frame. U = 0.71 to 0.99. An old wooden, single glazed window is better than a metal framed double glazed window.
  4. Single glazed window with tight storm window. U = 0.50
  5. Double glazed, clear glass. Non-metal frame. U = 0.41 to 0.55
  6. Double glazed, low-e glass. Non-metal frame. U = 0.26 to 0.40 depending upon frame.
  7. Triple glazed, low-e glass. Non-metal frame. U = 0.15 to 0.25

Comparing U-values, we can directly compare the relative energy efficiencies of these different styles of window. For example, if you install a super insulating, triple glazed window with a U-value of 0.20, this will lose 20%-25% as much energy as an old single glazed clear glass window. That is truly substantial. In fact, when I renovated my own home, I went this route. Not because I knew the energy savings will pay off (they won’t) but I was trying to optimize my entire home’s energy efficiency and comfort.

Suppose you have a moderately old wood frame, single glazed window with a tight fitting storm window. This might have a U-value of around 0.50. If you were upgrading to a double-glazed, low-e window, which typically has a U-value of about 0.35, then the new windows would only reduce the energy loss through the window by 30%. Not bad, but not great and probably not worth the investment.

In addition, most new windows are installed poorly. I have seen many instances where a house was less comfortable after installing new windows. Why? Because the installers did not seal around the windows properly and air infiltration is much worse for energy loss than is poor insulation.

If you remove the trim from around a window, you would see something like this. The window unit would be shimmed out and nailed into place. Around the perimeter are big air gaps. Sometimes, you can even see right outdoors.

The problem is, most installers just shove fiberglass in these cracks. Fiberglass is not an air barrier. In fact, when compressed like this, it isn’t even a good insulator!

Please see my website for more detailed information on proper window installation.

For all these reasons, if your windows are in good shape and don’t seem drafty now, then I usually don’t recommend replacing them. Instead, start with some high-quality window treatments.

It’s amazing how much of a difference cellular shades or window quilts can make. At a fraction of the cost and disturbance of new windows, properly installed shades or window quilts can reduce energy loss by anywhere from 50% to 80%, making your home more comfortable and energy efficient.

Practically speaking, usually I recommend that people outfit one room with these initially to see if they yield the desired improvement. However, you really can’t go wrong with these unless you’re planning on renovating anyway and will be upgrading the windows. In that case, I suggest holding off on the window treatments until you get the new windows because often the new windows will be a different size and the treatments might not fit then ew windows.

For more detailed information, please see the links below.

Other links:

Dept. of Energy – Energy Performance ratings for Windows

Dept. of Energy – Energy Saver Tips for Windows

Efficient Windows Collaborative for more technical information on windows.

Florida Solar Energy Center – Windows

Grace-Vycor – Contractor’s Guide to Window Installation

National Fenestration Rating Council – General website

Bright Ideas for Saving Energy #3 – Light Bulbs Add Up

The pie chart shown here should look familiar by now. We’ve already talked at length about the big slices of the pie – heating and cooling. Now it’s time to move on to lighting, shown here as 12% of the typical household energy usage.

In my experience with real homes occupied by living, breathing families, that 12% number may considerably underestimate the actual energy consumed. I’m sure that I’m biased because in my area, there are lots of large homes with modern amenities like ceilings filled with recessed lighting.

Fortunately, this is one area where homeowners can easily assess their own energy use and take actions that immediately reduce their energy use.

I have a good friend who moved into a new house. After the first few months of living there, he was about ready to move out because his monthly electric bill was averaging around $750! Fortunately, being a good engineer, he quickly noticed that this house was well lit – very well lit! There were dozens of recessed lights on each floor of this home. And with two children active at home, most of these lights were on all waking hours.

At first, he would follow the family around, grumbling as he turned off light switches. But this was a losing battle. He simply could not keep up with this round the clock. It was frustrating to him and annoying to his family. What to do?

My friend decided to start changing light bulbs. Week by week, he replaced the high usage lights with high quality compact fluorescent bulbs, each using about one quarter of the energy of the original bulbs. Pretty soon he had a box of old 90w flood lights, replaced by 23w CFLs. He was happy knowing that the house was still well lit and safe for his family but every bulb saved 67w. He also was glad not to have to replace the bulbs as often because his home has high ceilings making changing bulbs inconvenient.

A few months later, my friend came to me with a big smile on his face. “Got my latest electric bill!” he said happily. I looked at him curiously, wondering why he would be so happy about an electric bill. “It was under $250” – he beamed. “Holy cow”, I said – “you knocked $500 off your electric bill?” “Yup – it was all those damned light bulbs. I still follow them and turn off the lights, but I don’t worry about it so much any more.”

While this was an extreme example, it is a real one. Light bulbs do make a difference – the more you have, the greater the potential savings.

I’m not going to argue about the pros and cons of compact fluorescent bulbs. There are more than enough sites that discuss mercury. Instead, I’m going to show you how much energy you can save and teach you how to prioritize bulb replacement.

Step 1: Monitor Your Usage

Spend a week just paying attention to how the lights are used in your home. Which lights are left on all day? Which to you tend to turn on and off frequently? Do you have outdoor “safety” lights that stay on all night? Are there lights where the “color” is particularly important (like above a dressing table)?

I highly recommend keeping a notebook where you log each area of the house, how many bulbs there are, the wattage of those bulbs, and the number of hours they are on each day. This will make your job even easier later one.

Step 2: Prioritize Your List

Once you’ve monitored your usage and created your list, find the area with the highest usage. The highest usage is defined by the number of bulbs times the wattage of the bulbs. For example, if you have two, 100 watt  flood lights on each of the four corners of your home and those lights are on from 8pm to 8am every day, that equals 100 watts times two bulbs times four corners times 12 hour. Arithmetically written: 100 x 8 x 12  = 9600 watt hours

If you’re not familiar with spreadsheets, this is the time to learn. Plug your list into a neat spreadsheet and you’ll be able to do all these calculations really easily and then automatically sort the list by watt-hour consumption figures.

Step 3: Replace Bulbs

Assuming that you want to keep the light output from the bulbs the same, find appropriate high efficiency replacement bulbs and start replacing lights! I highly recommend checking out the EFI Store. I’ve been buying most of my energy efficient lights, fixtures, etc. from them for years and they’re amazing. Their entire business is built around helping people save energy. And, they sell quality products unlike the “big-box” stores that sell a lot of poor quality items.

A Few Considerations

  • I mentioned earlier that there are some fixtures, like above a make-up table, where you might not want to change the bulb to a CFL because color quality is important. I don’t want to sound sexist, but there’s no way around it – if you have a place where you or your spouse puts on makeup or gets dressed, don’t use CFLs. Most modern CFLs don’t have the color quality needed for this critical need.
    However, some of the LED lamps, like the CREE units sold by EFI, do provide excellent light quality.
  • LED bulbs are expensive, there’s no way around that. However, in high use areas, they can pay for themselves in a few years. They also last forever (25,000-50,000 hours) so there’s a good chance that you’ll never have to replace them.
  • If you are going to replace a light controlled by a dimmer, make sure that the replacement bulb is “dimmer compatible” or “dimmable”
  • Do not use fluorescent bulbs in areas where they’ll be on for short periods. The life of a fluorescent bulb decreases the more often it is switched on and off. So a bulb rated for 5,000 hours of life might only last 2,000 hours if flipped on and off frequently. Fluorescent bulbs are best suited for those areas where they’re left on for hours at a time, such as living space lights or outdoor safety lighting.
  • Fluorescent bulbs take a long time to warm up in cold weather, making them inappropriate for outdoor lighting that must come on quickly. For example, if you have motion sensors, this is not an appropriate place for fluorescent lights. However, this is a good place for LED lights since they come on to full brightness immediately. On the other hand, I use 13w CFL bulbs in my outside post lights that I have on a timer to come on at sunset and turn off a few hours later. They’re perfect for this application.

How Much Can You Save?

Remember the spreadsheet I had you to make earlier? Well, now’s the time to look at it more carefully.

The example of outdoor lighting I walked through showed that those outdoor bulbs use 9,600 watt-hours per day. Divide that by 1,000 to get the kilo-watt hours of use per day. In this case, 9.6. Electricity is sold by kWh, so this lets you easily compute the cost.

You’ll want to look at the rating of the bulb you buy to replace the inefficient one and do the calculations again. For example, if you replaced those outdoor lights with 23 watt CFL bulbs, the calculation is: 23 x 8 x 12 = 2,208.

Now, subtract this from the original to get the daily savings: 9,600 – 2,208 = 7,392 or 7.392 kWh per day.

Let’s calculate the yearly savings. Multiply the savings by 365: 7.392 * 365 = 2,698 kWh

And, determine your real electric cost per kWh. Do this by looking at your total electric bill and dividing the cost by the total kWh on the bill. This will include all charges for generation, transmission, taxes, etc. and will give you a rough true cost of electricity. For example, if your utility bill was $200 and you used 1,500 kWh, your cost per kWh is: $200/1,500 kWh = $0.133/kWh.

Finally, multiply these numbers together to get the yearly savings: 2,698 * $0.133 = $360.

So there’s a complete and realistic example – replacing eight 100w bulbs that are on for twelve hours a day can save $360 per year, assuming you’re paying 13 cents per kilowatt hour. This is pretty typical. Add up your savings for all your fixtures and you can see how significant the savings can be.


Where to buy your bulbs:

As noted throughout this post, EFI.org is the place I buy my high efficiency lights. Yes, if you click through these links, I’m part of their affiliate program, so I profit from your purchases. But that’s not why I recommend them. I recommend them because they’ve devoted their lives to helping consumers live more efficiently. They’re not some Johnny-come-lately store that’s just doing it because it’s the latest trend. Check out their blog and “about” pages and you’ll see. They deserve our support.

Bright Ideas for Saving Energy #2 – Check your Ducts

If you have any ducts in your home for heating or air conditioning, you might be losing a huge amount of energy. The good thing is, many of these problems are very easily solved if you’re not afraid to get a little dirty. How does five minutes and a roll of tape sound for a 30% energy efficiency improvement sound?

Attic Mounted Air Handlers

If the main blower (called an ‘air handler’) of your system is mounted in the attic, there’s a really good chance that you’re losing a significant amount of your system’s efficiency due to air leaks.

The air handler distributes air throughout the house. If you look up in the attic, you’ll see a variety of ducts going to and from the air handler. Every connection is suspect, but the worst problems are usually due to leaks where the air handler sucks air in.  This is called the “return” side of the system because the air is returning back to the system from the house.

Why are return air leaks so bad?

Think about the air in an attic. It’s dusty and usually filled with fiberglass particles. It’s also super hot in the summer and cold in the winter. The humidity in the attic usually matches the outdoor humidity, so that it’s very dry in the winter and damp in the summer. Any time there’s a leak on the return side of the system, that nasty attic air is getting sucked in and distributed around the house. Not only is this a serious efficiency problem, it can have health consequences.

How bad are return air leaks?

Consider a typical winter night when the heating system runs. It might be 30 degrees F in your attic. When the system sucks that air in, it has to raise it up to 100+ degrees to heat your home. This is as compared to heating up the 70 degree air in your house. This temperature difference multiplies how hard the system has to work. It is typical for the system to have to use two to four times as much energy to heat the air from the attic as the air from the house. That means a 10% leak gets multiplied to a 20%-40% decrease in your system’s efficiency!

During the summer, the same thing occurs, except now the system is sucking 130+ degree air in and trying to lower it to 50F for air conditioning. Now things get really bad! Your air conditioner cannot reduce the temperature of the air that much, so the system does a much worse job at air conditioning. Plus, it’s pulling all the humidity in, which makes the system work even harder. The net result is that your air conditioner can be almost worthless, or worse than worthless because it will be pulling in so much hot and humid air.

How do I know I have duct leaks?

There are a few telltale signs of return air leaks:

  • Very dusty house – if you clean often and yet you find the house gets dusty fast, you probably have a serious leak.
  • Very dry air in the winter
  • Very humid air in the summer, in spite of air conditioning
  • You feel drafts from the air registers when the system isn’t running
  • Your air filter gets dirty quickly
  • You can see the leaks

Where do I look for leaks?

The first thing to do is look at your air handler. The most common problem is when there’s no cover over the filter slot. This problem will easily decrease the efficiency of your system by 30%. In addition, you’ll find that the filter clogs up very quickly, like this one that is completely covered in dirt.

The next place to look is around the ducts near the filter. You can use a smoking incense stick and watch the smoke as you move it around the air handler while the system runs. If there’s a leak, the smoke will suck in, leading you right to the source of the leak! You can also purchase a cheap smoke gun, which works like a fog machine.

Another common place for leaks is where the ducts attach to the ceiling. They’ll usually be connected to the ceiling via a sheet metal box called a “duct boot.” Follow the ducts to each boot. Before you touch anything to look at the boot, take a look at the insulation around it. If it looks dirty or discolored, that’s a sure sign of a leak. It might be a duct leak or a leak from the house into the attic. In either case, you want to find the problem and seal it up.

It’s beyond this post to go into all the details about proper duct retrofits, but at least you can find them and know why you need to fix the leaks. One hint though – never use “duct tape” for sealing ducts. It’s not named right. It will always fail.

How do you know if your air handler is leaking into the attic?

Sometimes it’s really obvious. Sights like this may me cringe.

Leaks from the air handler into the attic can be pretty obvious during the winter. If you see a lot of snow melting off your roof, usually there’s a duct leak below it in the attic. So the first thing you should do is look at the outside of your house if there’s snow on the roof. There’s another post all about this that will help you find those problems.

The easiest thing to do is check where all the ducts connect to the air handler and the main trunk line (the big duct that comes off of the air handler, to which all the other ducts are attached). Make sure that all the ducts are tightly attached and air-tight. Each duct that is lose could be responsible for a 5%-10% decrease in your system efficiency.

This should be enough to get you started. For minimal investment in time and supplies, you can often improve your system’s energy efficiency by more than you could by purchasing a new, high-efficiency system. Even if you did buy a new system, if you don’t fix these problems, it will still work more poorly than an average system with excellent ducts.

The general rule is – if it looks wrong, it probably is!

-Happy hunting

5 Bright Ideas for Saving Energy – #1 – Know thy use

When I give talks or do energy audits, people want to know the “best” ideas for saving energy. You know – the things that cut your energy bills in half and don’t cost much to implement.

Interestingly, this isn’t as crazy as it sounds. I’ve based my career on trying to give out as much practical information as possible. The theory is, if it’s easy and you can afford to do it, you’re much more likely to actually improve your home. This is as opposed to the idealist’s approach which promotes only doing things if you’re going to do them perfectly.

Without boring your further, let’s dive into five things that you can do to save energy in a meaningful way.

1: Know how to read your utility bill

By far the most important step to take is to learn how you and your home are using energy. This lets you prioritize your energy saving measures in a way that is most meaningful. I’ve seen people spend weeks caulking ares of their home that make absolutely no difference while leaving huge problems untouched.

I always recommend getting an energy audit as a starting point. However, the purpose of this article is not to get you to buy energy audits, it’s to teach you how you can do things yourself, so I’m going to skip that method.

The first thing is to look at your own utility bill. I can show you spreadsheets showing how other homes act, but there’s nothing like looking at your own utility bill.

Almost every electric bill has a graph like this one, showing a year or 13 months of usage data.

The vertical axis shows how much energy is used each month. In this case, it’s scaled from 0 to 2700 kilo-watt hours, or kWh.

Definition: a kWh is the amount of energy used by ten, 100 watt light bulbs in one hour.  This is the same as one, 1000 watt heating pad. If it adds up to 1000 watts and it runs for one hour, it uses 1 kWh per hour.

I hope that’s clear, because everything about electricity consumption depends upon you understanding what a kWh is.

On the horizontal axis is months. In this case, it runs from September of 2008 to September of 2009. This lets you compare this year’s bill for September with last year’s bill. This is very handy since it shows you at a glance if anything has changed dramatically since last year.

What does this graph tell us?

Look at the pattern of usage. The graph shows similar electrical consumption during September, October, May, June and August. Each of these has a total usage of about 450 kWh for the month or about 15 kWh per day. I’d include July, but that actually shows a bit less consumption. Maybe the homeowner went on vacation for a week in July?

What do these months have in common? The answer is – you don’t heat your house in these months. Now, look at the heating months. (Side note: this is from a home in Eastern Pennsylvania. This is a very typical heating consumption curve.)

The graph shows electric usage increasing in November, December, peaking in January, then dropping in February, March, and April. This makes sense too since January is consistently cold, so you’d expect the most usage when it’s cold. So everything makes sense.

Take a step back. What does this graph say about the house? It says that the occupant is using electric heating in an amount that is related to the outdoor temperature.

I’ll tell you a secret – this house is heated with oil, so somehow, the owner was paying a double heating bill, once for electric and once for oil. So just looking at the electric bill tells me that there’s something very wrong with this home. After all, if the home is heated with oil, why are they paying for an extra 2,000 kWh in January? That’s $320 in added electric costs (in this area). Over the course of the entire winter, they’re using 5,200 kWh, or about $830!

Winter usage spikes usually means electric heating

We’re learning an awful lot by looking at one part of an electric bill. Without even looking at the house, you know that there’s something happening here that’s dramatically increasing their electric bills in the winter. Common sense shows us that the usage corresponds to winter temperatures so it’s extremely likely that they’re using electric space heaters somewhere in their home.

It’s also telling us that they don’t use air conditioning during the summer. If they did, the graph would jump up during July and August, which can be pretty hot and humid in these parts.

Baseline electrical usage

Go back to our earlier observation that most of the non-heating months show an electric consumption of 450 kWh per month. The average usage during the low-usage months corresponds to the baseline electrical usage. This is the amount used for things excluding seasonal loads like heating and air conditioning.

For most homes, the baseline electrical usage includes electricity used for televisions/electronics, electric lighting, clothes washers/dryers, computers, dishwashers, electric water heaters, etc. – things you use all year long.

In this particular case, they use 450 kWh per month, or 15 kWh per day. This is comparatively low. Most homes I measure have 25-50 kWh per day consumption as the baseline, so the graph also tells us that there is nothing that is excessively sucking down electricity in the home during the non-heating months.

Getting More Specific

We’ve spent a lot of time looking at the broad usage patterns. What about specific consumption? Suppose we saw something that caught our eye on the graph, like high baseline usage? What then?

Recall in the definition of kWh I wrote: “a kWh is the amount of energy used by ten, 100 watt light bulbs in one hour.” I defined it that way because it frames an abstract term “kilowatt-hour” in a way that anybody can wrap their brain around. Ten 100 watt lightbulbs burning for one hour. Easy!

So, a home that uses 15 kWh in a day is using as much as those ten lightbulbs would burn during the waking hours. That’s not bad considering it includes all the washing, drying, dishes, television, etc.

On the other hand, if you found that the home had a baseline of 45 kWh, that would be like 30 bulbs burning all day – ouch! In fact, when I see a high baseline electrical usage, one of the first things that I’ll do will be to walk around the house, basically counting lightbulbs.

Obvious Problems

Quite often, these homes will be newer ones filled with recessed lights in the kitchen, living and family rooms. I’ll point at the kitchen ceiling, filled with 15 brightly burning flood lights and ask – “how long are these on during a typical day?” The answer is usually “oh, we keep those on from the time we wake up until we all go to sleep.”

At this point, my face will usually show disapproval (I’m really bad at hiding my emotions!) and I will say something like “do you know that those 15 lights, each 90 watts, are consuming about 20 kWh per day? That’s more than the ENTIRE household consumption of many homes?”

Anyway, I digress. The point should be well taken. Sometimes, the cause of your high consumption is blindingly obvious!

Not-so Obvious Problems

That was an easy (but very common) problem. What about the harder ones?

Well, sometimes, you just have to measure things, using a kill-a-watt meter like the one shown at the top of this post. This is a simple to use electric meter that any homeowner can use to measure the load of things that you plug in. For example, if you want to learn how much electricity that old fridge in the garage is using, just plug it in for a day and you’ll get a very accurate measurement.

Side note: occasionally, I’ll post links like this to items in the Ted’s Tips Amazon store. I’ve put together this store to hold all the items that I refer to on this blog so that you’ll be able to find them in one convenient place. Originally, I was linking to a lot of different sites, but then people would ask me where they could purchase them. Since I’ve been an Amazon user for years and know them to be extremely reliable and have low costs, I figured it was easiest to go this route. Anything you purchase there helps support this site. Thanks!

Back to measurements…

What Things Should You Measure?

You could spend months measuring everything in your house, but I’ll tell you where to start. These are the biggies. The proverbial “energy hogs.”

  • Refrigerators, especially old ones or those in garages during the summer
  • Dehumidifiers, especially those in damp basements or crawlspaces
  • Space heaters
  • Frequently used Halogen lamps
  • Anything with a heater in it that gets used a lot
  • Entertainment centers (especially large screen TV’s)
  • Large stereo amplifiers that get used many hours a day
  • Large gaming computer rigs

You should also make note of the following light fixtures. Keep track of the wattage of the bulbs and the length of time they burn each day.

  • Outdoor lights, especially bright flood-lights
  • Common area lights that are on most of the time (kitchen, living/family room, hallways)

I’m going to stop here for the day. This is more than enough to get you started doing your own home electrical consumption audit. If you follow these suggestions, learn how to read your utility bills and figure out how much energy you’re using, you’re well on your way to lowering your electric bill, maybe substantially. So get cracking – the watts are-a-wasting.

Energy Costs

Sorry, I couldn’t come up with a snappy title for this one. This is about money and energy, so it’s a bit dry.

After my recent post on water heating, a friend dropped me a note and reminded me that the economics vary considerably depending upon the cost of the fuel. This is absolutely true, though unless you’ve studied a lot of utility bills, you might not realize just how much energy costs can vary.

Generally speaking, we have four energy sources that are widely available:

  • Natural gas
  • Propane
  • Heating oil
  • Electricity

Depending on where you live, the cost of each can vary widely. To complicate matters further, the price varies throughout the year, usually in proportion to the demand. So, for example, heating oil cost is the greatest in the dead of winter when you need it the most.

For the rest of this post, unless I note otherwise, I’ll be comparing fuels based upon their normalized cost. That is, I’ll be comparing the cost based upon the same amount of useful energy contained in the fuel. This can get confusing because most people refer to cost per gallon, but that’s meaningless because a gallon of liquid propane contains far less energy than a gallon of heating oil and you can’t even buy a gallon of natural gas or electricity.

Instead, we’ll be comparing fuels based upon their cost per million BTUs (also called MMBtu). What’s a million BTUs? It’s:

  • 7.25 gallons of heating oil
  • 10 CCF (or therms) of natural gas
  • 10.92 gallons of liquid propane
  • 292.91 kilowatt-hours of electricity

You can think of it as about the energy contained in half a tank of gas.

So the million dollar question is, how do fuels compare based on an equivalent amount of energy that they’re capable of producing?

To answer this, we have to look at a range of prices. For example, on the West coast and in the Northeast, fuel costs are quite high. Electricity in most areas is $0.15-$0.20 per kilowatt hour (KWh). That means the cost per MMBtu of electricity ranges from $43.94 to $58.58. But in some areas, or under certain rate plans, electricity is as low as $0.07 per KWh so the cost per MMBtu drops to $20.50.

So you see, this really complicates cost comparisons. That’s a three times range of cost. And it only gets more complicated when you compare multiple fuels! To simplify matters, here’s a table with each fuel, a range of costs, and then the corresponding range of costs per million BTUs.

Now the picture is getting a little clearer. You have natural gas at a low cost of $7 per MMBtu up to Electricity at almost $59 per MMBtu. That’s quite a range for the same amount of energy!

Let’s make this even more interesting! Instead of an abstract term like MMBtu, let’s convert this to “1,000 gallons of hot water”. I have to make a few assumptions here because this new calculation depends upon the starting and ending temperature of the water. For this, I’m basing the calculations on 50 degree water coming in and 130 degree hot water.

Heating 1,000 gallons of water takes 666,400 BTUs of energy. So if you were able to capture 100% of the energy contained in each of the fuels above and transfer it to the water for heating, you’d get the following:

What does the fuel really cost?

Notice that in all this discussion, I’ve kept things simple by just talking about the energy contained in the fuel. That assumes 100% efficiency. Unfortunately, nothing happens with 100% efficiency so we now have to complicate matters further by considering the actual efficiency of each system.

For these calculations, I’m going to use the typical efficiencies achieved in most households. You have to build your own spreadsheet if you want it to be accurate for your own situation.

Water heaters and their corresponding efficiencies

Water heaters are rated by their “energy factor.” This is a rating based upon the combustion efficiency and the heat loss of the storage tank, all measured under “typical conditions” whatever that means. The energy factor is a number from 0.0 to 1.0 representing 0% efficient to 100% efficient. I don’t know why they didn’t just use % efficiency, but they didn’t, so just remember an EF of 1.0 is perfect.

Natural gas, propane or standalone oil water heaters have an EF of about 0.59. Yes, you read that right – your conventional, combustion type water heater is only 59% efficient, if you’re lucky.

An electric storage tank water heater has an EF of about 0.90, or 90% efficient.

There are other technologies and types of water heaters, but in practice, these numbers apply to the vast majority of the homes in the U.S.

This tells us that the actual cost to heat your water is considerably different than what I showed in the tables above because the efficiency changes things, making electric water heaters much more appealing if you have cheap electricity.

Just for completeness, I’ll convert the table above to include these efficiencies. So the following table represents the cost to heat 1,000 gallons of water in a real water heater.

This final table represents the price range that a consumer would expect to pay to heat 1,000 gallons of water based upon typical water heater efficiencies and the range of fuel costs across the United States.

It has been a long journey, but if you followed it, you should now be able to figure out how much it’s really costing you to take a 20 minute shower or wash clothes with that old washer.

Postscript

In another post, I’m going to describe how you can analyze your own utility bills to see how much fuel you’re actually using for hot water. All these numbers are great, but what’s really important is how much it’s costing you to heat your water based upon your actual consumption.

Question: What are your thoughts on solar heated water?

Question: What are your thoughts on solar heated water?
Answer:

Solar water heaters are one of the most underutilized alternative energy systems in the U.S. What could be better than reducing your energy consumption using the sun? Many other countries have “got it” and you’ll see solar water heating systems on most roofs.

There are three problems with them – we charge too much ($7000-$10,000), there aren’t enough qualified installers and they require maintenance. But if sized and installed properly, most families could satisfy 75%-90% of their hot water needs using solar on any sunny day.

Here are some resources for further reading:

Build it Solar – Site for solar DIY’ers.

U.S. Dept. of Energy

Wikipedia – Extensive article on solar water heating


Water heating – trimming your bills

If you haven’t yet read my first posting about water heaters, I highly recommend that you do so now. Without that foundation, you’re not going to get the most out of this article.

Invariably, this question comes up – “how do I reduce my water heating bill?”

Let’s break this down into a few parts. What affects your bill?

  1. The amount of hot water you use
  2. The efficiency of your water heater
  3. The cost of your fuel
  4. Other inefficiencies

I’m going to address these points one at a time, because each one is important to understand and all impact your energy bills.

Reducing your hot water use

This one is obvious. Reduce the amount of water you use and you directly cut your energy bills. But how can you cut back on hot water use? I’m assuming that you aren’t willing to change your lifestyle because most people aren’t. I mean seriously, if you’ve taken 20 minute showers your entire life, are you suddenly going to start taking 10 minute showers, even if you know it might save you $100/year? Probably not.

Top ways to reduce your hot water usage:

Shower heads

Showers are one of the biggest consumers of hot water. Consider an older 4 gallon per minute shower head. That’s 60 gallons of water or maybe 40 gallons of hot water for each 15 minute shower. Ouch! That’s going to cost a fortune. If you can reduce that to 2 gallons per minute (GPM), you cut that to 20 gallons of hot water without changing your lifestyle. So the first act I would take is replacing the shower head.

But before you rush out and buy new shower heads, you might want to measure the flow of your existing heads. Just turn on the shower and time how long it takes to fill a 5 gallon bucket then calculate the number of gallons per minute. Easy!

  • If you’re not already using a reduced flow shower head (1.5-2.5 gallons/minute) then invest in one. I’m not talking about the pathetic little ones they sell that couldn’t wash the soap off a bald man’s head. I’m talking about nice, designer shower heads, that are designed for efficiency. Things like this one. I’ve used one of these for years and love it. No, it’s not the most efficient one around, but it’s reasonably efficient and it actually works.
  • If you’ve got teenagers who take really long showers, then get one of the 1.5gpm shower heads. They don’t work quite as well, but if they’re taking hour long showers, they can deal with a little inconvenience! If you’re feeling generous, you might get this one or this one.

Laundry Machines

Usually, I don’t endorse getting rid of perfectly good appliances – in most cases, it’s just wasteful. But I make an exception for laundry machines. The new front loaders with high-speed spin-dry cycles are worth the investment on so many levels.

A typical, old style, top-loading washer requires filling the entire tub with water multiple times during the cycle, using up to something like 35 gallons of water. They’re incredibly wasteful! Add to that the fact that the clothes are still pretty wet after the spin dry and you’re paying a lot more to dry the clothes as well. Finally, those agitators are simply brutal on delicate clothes. In all respects, top loaders are simply destined for extinction.

The front loader cuts your hot water usage very substantially. If you want a detailed discussion of them, go to the Energy Star website. They do require a little different usage, and special soap, but that’s a small price to pay for $100-$200 savings per year in reduced water use. They’re truly awesome!

Wash Clothes in Cold Water

You’ve heard it before and I’m going to say it again – the most efficient usage of hot water is not using hot water at all.

With modern laundry detergents, you do not need to wash clothes in hot water, and the savings can be hundreds of gallons per week if you do a lot of loads of laundry. That adds up to huge reductions in your hot water use over the course of a year.

Ok, so maybe you’ll still use hot water for some things, like your kids white socks that they wear outside without shoes or their football uniforms. But for a typical person, hot water wash is a complete waste.

Whole House Humidifiers

Many homes are outfitted with whole-house humidifiers. These bolt on the side of your furnace and introduce water into the air stream to humidify your home during the winter.

Unfortunately, some lazy product designers decided it was a good idea to run hot water through these units to help humidify the air because the hot water will be more “steamy” and work better. So what do these idiots do? They design a machine that runs something like 6 gallons of hot water through the system every hour, even when they’re only using a tiny fraction of that to humidify the air. Why? Because hot water is much more prone to scaling problems, so they run the water to flush out the mineral buildup!

Over the course of a day, that humidifier can be doubling your hot water use, easily. So over the course of a winter of use, that’s adding hundreds of dollars to your utility bills. Horrible. Stupid. Wasteful. These things should be outlawed.

If you’ve got one of these units that runs on hot water, disable it, shoot it, rip it off, and throw it in the trash. If you must have a humidifier (I’ll cover this topic in another post) then get one that uses cold water and a misting system or a sponge-like element.

BTW – I wrote an entire post about central humidifiers and their evils.

Remember to Fix those Drips!

Remember – there’s no such thing as a small leak! Even a slow drip can be gallons per day which means hundreds of gallons per year. That’s dollars out of your pocket and wasted water for absolutely no reason.

If you have a leaky faucet, fix it. Any homeowner should be capable of turning off the water supply and replacing a washer or faucet components. They’ve made it pretty easy for most things. So don’t hesitate. Fix the drip!

Here’s a nice tutorial on the subject.

And if you don’t like to read, here’s a video.

< End of part 2 >

Ok, I’m stopping here for the day. These have been the biggies and I’ve given you enough information to save you hundreds on your water heating bills each year. Now get busy replacing shower heads, buying new washers and dismantling your whole-house humidifiers!

Retrofit your attic hatch for improved comfort and energy efficiency

Link: Retrofit your attic hatch for improved comfort and energy efficiency

Thermal image of leaky attic hatch

The typical attic hatch is drafty and improperly insulated. Fixing it can reduce the energy loss of a room by half. This afternoon project is simple and cost effective providing results you can enjoy year-round.

If you’re looking for the best commercial product on the market, check out the Energy Guardian attic hatch covers from ESS Energy Products. They’re by far the nicest product I’ve seen for this application.