Let’s look at car charging. Consider a Level 2 home car charger. (Wikipedia article on car chargers.) These are the type that wire into your home’s breaker box using a 240V line (in the USA). These charge your car at up to ~7.2 kilo-Watts (7,200 Watts), drawing ~32-40 Amperes of current. (note: for the rest of the article, I’ll use the shorthand notation – ‘V’ for Volts; ‘W’ for Watts; ‘kW’ for kilo-Watts, and ‘A’ for Amperes.)
This sounds like a lot, but how does it compare to other things in your house?
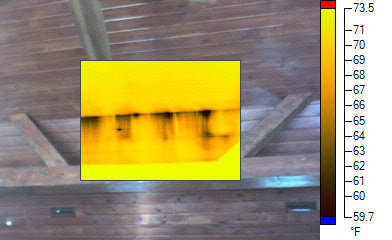
Tongue and groove ceilings – they’re beautiful, but like many beautiful things, they can be problematic.
(Photo shows a thermal scan of a ceiling where cold air is leaking in through the gaps – those are the black streaks down the photo)
Unfortunately, T&G ceilings have become the single most discussed items on Ted’s Energy Tips due to their overwhelming tendency to be associated with water, mold, or moisture problems.
Does your ceiling drip water?
I’ve probably heard this a hundred times – “Help! Water is leaking from my ceiling! We had a cold snap and now it’s a beautiful day and now it’s raining in my house!” The caller/writer then tells me that the roofer came out to check for leaks and couldn’t find anything. If they took it a step further, someone pulled off some of the ceiling planks, saw the real problem (condensation) and told them that they need to ventilate the ceilings. If they’re unlucky, they spent thousands of dollars, added ventilation, and the water problems became worse!
Why do ceilings drip when there’s no leak?
Boil a pot of water with a lid on it. Wait a minute then lift the lid. What do you see? Lots of water on the underside of the lid. There’s no ‘leak’ but yet the lid is covered with water due to condensation forming on it. This is exactly what’s happening inside your ceiling. Under the right conditions, when water vapor in the air comes in contact with a surface cooler than the air, the water vapor becomes liquid water. If this happens enough, the water builds up and forms large drop of water. Those get large enough and, PLOP!, it starts raining in your house!
All too often, a T&G ceiling is constructed in a way that virtually guarantees water problems. The roof is installed over the rafters. Fiberglass is shoved between the rafters. T&G boards are nailed to the rafters. Bingo – you get mold, water “leaks”, and thousands of dollars of repairs which probably don’t even fix the problem.
Why don’t normal ceilings drip?
A typical ceiling is made of sheetrock or plaster, and all the seams are carefully filled in. That’s then painted, usually with several coats of paint. While some tiny amount of water vapor can get through the paint and sheetrock, it’s a very small quantity. Small enough that, under normal conditions, natural air flow and moisture transfer removes the moisture that does get into the ceiling cavity above the sheetrock.
However, even these ceilings often have problems when holes are cut in them for recessed lights. This allows that air and moisture to move much more quickly into the ceiling where it can condense and lead to mold growth and wood rot. The key fact – if air gets into your ceiling, even through small holes, it will carry water vapor with it which is very likely to lead to moisture problems.
Why are T&G ceilings so bad?
Water vapor is tiny. Really, really tiny. So tiny, that even the smallest crack is billions and billions of times larger than the water molecule. Tongue and groove ceilings may look ‘tight’ but to a water molecule, it’s like a wide open door! So that water vapor simply flows right up through those cracks and into the ceiling cavity above.
To Make matters worse, most ceilings are stuffed with fiberglass insulation, which doesn’t stop the water vapor at all. So the vapor keeps wafting up past the insulation until it reaches the underside of your roof. That roof deck is cold in the winter and on clear nights. When the vapor hits it, it condenses into liquid water. This is when the real problems start…
When it’s below freezing, the water freezes into ice. More water vapor enters, contacts the ice, and adds to the ice. Before you know it, the entire underside of the roof and anything else cold enough in the ceiling cavity, is covered with a layer of ice. This could go on for days, weeks or even months until the ice melts and it starts raining in your living room!
Even when it’s not below freezing, in most climates, it gets cold enough and there’s enough water vapor carried by the air for condensation to form inside the ceiling. The wood can absorb some of that moisture and slowly transfer it out. But with a T&G ceiling, the water supply inside the house is nearly infinite, so it keeps building up. Pretty soon, the wood is saturated and larger water droplets form. They’ll drip down, following gravity, until they find a place to leak out. That’s why the drips often form far away from where the condensation is actually occurring, which is often high up the ceiling.
Will ventilation solve the problem?
Builders are taught that roofs have to be ventilated in order to ‘flush out’ the moisture. The problem is, that doesn’t work with T&G ceilings. In fact, it often makes problems worse.
Why? As the air moves through the cavity, it has a tendency to draw more air from the inside of the house into the cavity. Some of that is flushed out with the air moving through the cavity. But when the water vapor carried by the air comes in contact with cold surfaces, it basically sticks. If there’s enough, which there usually is in a house during winter, then you still have the condensation problem.
How do you prevent water vapor from getting in the ceiling?
Take a step back. What ceilings work properly? We started discussing how a typical drywall ceiling usually doesn’t have moisture problems like these (unless you put holes in it). So the easiest solution is to build a normal drywall ceiling over which you install the T&G boards – purely for aesthetic purposes. Drywall is cheap. Replacing your roof is expensive.
What about plastic sheeting?
Drywall is cheap. Replacing your roof is expensive. Some builders try to ‘cheap out’ by just putting plastic up, usually with thousands of staples, then nailing the T&G boards to the rafters, with thousands more nails. Do you think a sheet of plastic with thousands of holes in it is going to stop the movement of water vapor, one of the tiniest molecules in nature, from getting into the ceiling? Maybe it will take 5 years to rot out the roof instead of 3. But eventually, you’re going to be spending many thousands of dollars for a new roof, just because the builder decided to take the cheap approach and save a little bit of drywall.
Ok, Ted, how would you build a T&G ceiling?
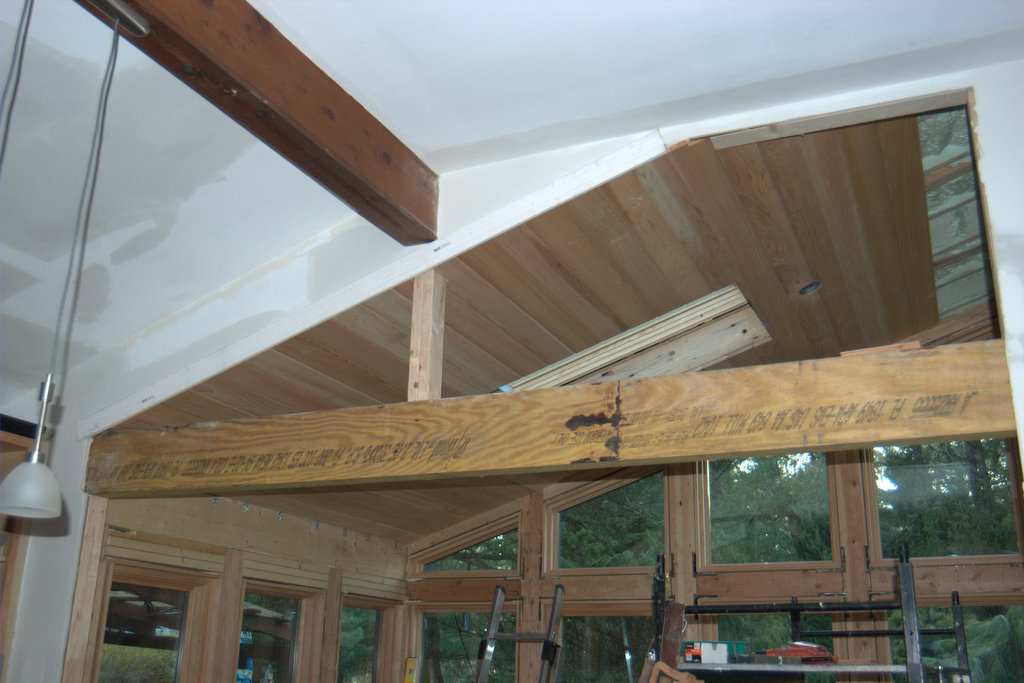
Lots of foam insulation. Works great!
Glad you asked. Here’s how I did it when we replaced our sunroom. We used high density spray foam. The foam completely fills the rafter bays, as in the photo above. Any remaining cracks are caulked. Then we installed the T&G ceiling to the rafters, like in the photo below:
Adding the T&G ceiling. No vapor barrier required with closed cell polyurethane.
We’ve had this ceiling for more than 10 years now with zero issues. It’s on the kitchen which gets humid from cooking, but still, no problems.
Would you do it differently if you did it again?
Good question! I might add a thin sheet of foil faced polyiso sheet foam across the rafters before installing the T&G ceiling to add another layer of moisture barrier and to reduce thermal bridging through the wooden rafters. In extremely cold climates, this would be highly recommended as you could still get condensation on the exposed rafters because they transmit the cold much more than the insulation. But in eastern PA where I live, it’s not cold enough to warrant that extra work for the minimal gain given this construction.
I already installed my ceiling, can I seal the wood or the seams?
In a word – no. That might slow the process slightly, but eventually you’re going to regret the decision when your roof rots out and your ceiling is filled with mold. Shortcuts don’t work with T&G ceilings. You have to do them right, or you’ll pay the price eventually.
Can I install recessed lights in a T&G ceiling?
If you’ve read much on this, or any other energy efficiency and building science website, you’ll know that recessed lights are nightmares. Yes, they look clean and some are even rated ‘air tight’, but those ratings are BS. They are filled with holes which let ample moisture through. That moisture will go into your ceiling and cause the same issues.
The compromise I’ll make is if you do a full foam job like I did and then install low-profile LED lights that don’t require reducing the insulation. Since the T&G ceiling isn’t an air barrier anyway, cutting holes in it to mount these lights doesn’t matter. The low profile LED lights look just like normal recessed lights but they don’t protrude into the ceiling cavity. Here’s an example of a ‘canless’ recessed light at Home Depot.
I’m not sure what happened, but I haven’t been getting notified of questions on Ted’s Tips for months now. I just thought everybody was happy or nobody was reading!
I think I answered the backlog of questions, but if I missed your question, please submit again, and I’ll get back to you ASAP!
For the last few years, I’ve been closely (Evy would say “obsessively”) following the electric vehicle (EV) market, waiting for the “perfect” car. I wanted something compact yet spacious enough to haul my bike or golf clubs. It had to have good range, preferably enough so I could use it with only a single recharge when visiting my folks on Cape Cod. It should be comfortable. It couldn’t cost a fortune. Easy, right?
VW e-Golf had been my daily driver for the last couple years
I had been driving a Volkswagen e-Golf for the last couple years. A friend wasn’t using hers, so I took over her lease. I liked the e-Golf a lot, and would have bought it IF it had more range. But this was one of the early models with under 100 miles of range under the best of conditions, so it was unsuitable for road trips. That was fine, as 99% of the time, I’m only driving locally and could use Evy’s car for road trips.
The Kia Niro EV seemed to be my “perfect” car
But the time had come for me to get my own car. The Kia Niro EV looks like the perfect car for me. It is exactly the right size, has a range of about 250 miles. Supports fast charging for road trips. It looks sharp. Has a ton of cargo space and is priced competitively. BUT, it wasn’t yet on the market, and I wasn’t willing to wait for it to come to Pennsylvania. Scratch that off my list, darn it!
The Hyundai Kona EV was my backup…
The Hyundai Kona Electric, the sibling of the Kia Niro was my second choice. It’s smaller than the Niro but still has ample cargo capacity. Since it shares the drive-train with the Niro, it’s peppy and has even more range (since it’s smaller). It’s similarly priced (mid $30’s before $7500 tax incentive). But again, it isn’t available widely yet. Plus, dealers have been marking it up well above MSRP, and I refuse to support price gouging. So back to the drawing board.
Tesla’s Model Y AWD is my “aspirational” car but it won’t be available for a long time
Then Tesla announced the Model Y, their compact SUV. The Model Y checks all the boxes for me except it’s a little larger than I wanted. It’s also more expensive. But it looks like a great vehicle. It has a range of up to 300 miles. Since it will use the Tesla supercharger network, there are plenty of charging stations along the i95 corridor, so I could drive anywhere around here conveniently. A big plus is it’s available in an AWD version, which is a big plus for Evy, who is a Subaru AWD die-hard. Even better, Tesla’s (poorly named) auto-pilot feature and top safety ratings make it desirable for longer trips. Finally, Tesla has a big head start on all the other car manufacturers so their cars are several generations ahead. Unfortunately, the Model Y won’t be on the market for a couple of years (at least!) Darn you Tesla for teasing me so!
Because I really wanted to get a car ASAP, I starting looking at used vehicles. I knew I didn’t want another first generation EV because their ranges were too short. A used Tesla was too expensive. What to do? What to do?
The Chevy Volt – an EV disguised as a Hybrid
After doing a lot of research, and checking used car prices, I decided that the Chevy Volt was the vehicle for me. Here’s why:
It runs ~50 miles on batteries alone, making it perfect for local travel.- As a hybrid, it has unlimited range (just like a regular hybrid) and gets good gas mileage (42 mpg) making it suitable for road trips.
It’s compact without being tiny.
You can buy used 2nd generation (2016-) with low mileage for around $20,000
It has decent cargo space with the rear seats folded down.
It’s comfortable as long as you don’t sit in the rear seats!
As luck would have it, a local Chevy dealer had a spotless Volt with modest miles on the odometer. They were selling it for a good price so I grabbed it.
I should note that Chevy recently announced that they were discontinuing the Volt, so I think dealers are moving them off their lots. Who wants a discontinued car? Me!
Why is the Chevy Volt Much Better than a Conventional Hybrid?
The first thing people ask is: “why not get a plug-in Prius or other plug-in hybrid? The answer is, basically, they suck as electric cars. Every other plug-in hybrid uses it’s gasoline engine at the same time as the electric motors in order to generate a useful amount of power. They were designed as conventional hybrids where the gas engine always runs. When they converted them to plug-in hybrids, which are just hybrids with larger batteries and a mode that turns off the gas engine, they neglected to give them powerful enough electric motors. These things are downright pokey in electric only range!
The Chevy Volt is what’s called a “serial hybrid.” Instead of using the gas engine to power the wheels directly, it’s used only to generate electricity to charge the batteries. The batteries, in turn, power the electric motors. The generator (gas engine) can also feed electricity directly to the motors. The electric motor is the primary drive and has to be powerful enough to do the job of accelerating up to highway speeds and pass safely. The Volt does this admirably. And, while it’s no Tesla, it leaves all the plug-in hybrids in the dust.
Here’s how the Chevy Volt’s drivetrain works
The downside is that it still has a gas engine, so the system lacks the utter simplicity of a completely electric car. But for $20,000, it’s a great vehicle. It’s been on the market for a number of years, so Chevy dealers know how to service it. And, as the battery capacity diminishes over time (they all do), it will still be useful because the battery is much larger than a conventional hybrid.
Is the Chevy Volt perfect? No, but no car is. The rear seats are definitely “child sized.” They have decent legroom but the headroom is pathetic. Evy whacked her head on the roof as she entered the rear seat. Ouch! The cargo space with the rear seats up is enough for groceries, but not big enough for my golf clubs, so mostly I drive with the seats folded down, figuring no passenger would want to sit back there anyway! Acceleration, while good (~8 seconds), is not blistering. But I’m not a motor-head, so that doesn’t bother me. It’s at least as good as other cars I’ve driven. But acceleration fanatics will find it lacking. Hybrid gas mileage could be better. Modern hybrids are getting more than 50mph, so the Volt’s 41mpg seems low. I won’t know the “real” mileage until I take a road trip since I drive it 100% on electricity now (infinite MPG!!!) I’ll report back after my first trip.
Overall, the Chevy Volt is a great “gateway” vehicle. It runs very nicely in electric mode, but you have none of the “range anxiety” you have with other electric cars. You just drive it normally and burn no fuel. Until you drain the batteries and the gas engine kicks in. This type of every-day normalcy makes it ideal for those who are looking at having a very eco-friendly vehicle without worrying about “will I get there?” And at their current used-car prices, they’re a “best buy” that I’d recommend for anybody looking to test the electric car waters.
As a baseline, consider that typical homes in the United States consume on average 30–60 kilo-Watt-hours (kWh) of electricity per day (=900–1800 kWh per month) at a cost of $0.10-$0.20 per kWh. Those running on electric heat often double these numbers.
In homes with electric heat, the heater can dominate all other electric consumers. Heat pumps, while considerably more efficient (1/3 – 1/2 the consumption) than straight electric resistance heat (like an electric baseboard heater) still consume substantial amounts of electricity. Consider that a typical heat pump system uses 3kW – 6kW while running, daily consumption in cold days can easily be 30–60kWh or more. This is why home insulation and air-tightness is such an important way of conserving energy. Same is true if the home is heated with oil, gas or propane – home heating and cooling costs dominate all others, so a tight, well insulated home pays dividends year after year.
Electric water heater – consumption varies drastically depending on a family size and hot-water usage. But an average is about 400 kWh per month. A modern heat-pump water heater can cut this in half.
Refrigerator/freezer – older units were much less efficient than a modern, EnergyStar unit. A typical range is 40–80 kWh/month.
Lighting – with the advent of energy efficient LED lights, this has shifted considerably. A home that has the equivalent of ten, 100W bulbs running 12 hours/day uses 12kWh per day or 360kWh/month. If all those bulbs were replaced by 14W LED bulbs that put out the same amount of light, that would be reduced to 1.7kWh/day or 50kWh/month. Lighting is an area where every home can dramatically reduce consumption by replacing conventional bulbs with LED in high use locations like the kitchen and living rooms.
Air conditioner – central air conditioners and their blowers consume from 3–7 kilo-Watt-hours (kWh) per hour of operation.
Home electronics – computers, DVRs, TV, stereos all add to a home’s use and together add up to 200W-1000W/hour, every hour. Typical consumption is 4–10kWh/day or 120–300kWh/month.
Cooking – electric ranges and ovens consume 2kW–4kW while running and might be operated for an hour or two per day on average.
Other items that add considerably to electric bills but are less common:
Pool pumps – most are drastically oversized and run 12 hours a day. A typical pump uses 2500W, so that’s 30kWh/day or 900 kWh/month! Replacing that with a two-speed or variable speed pump can cut this by 75% – well worth the investment.
Spas/Hot tubs – outdoor hot tubs use about 6–15kWh/day, depending on usage, design and temperature, call it 10kWh on average. That’s 300kWh/month. Since many people don’t use their tubs during the winter, it pays to shut it down for the winter, saving about $50/month.
Ponds – ponds have become very popular in the suburbs but most people don’t realize how much they cost to run. Those waterfalls require larger pumps, consuming 500W–1000W while a basic pond filter pump might use 100W-250W. Consider an average of 500W for 24 hours is 12kWh per day or 360kWh/month.
It’s extremely educational to install a whole-house energy monitor or use an inexpensive plug-in energy monitor to see how much energy each of your devices consume. But watch out, once you do, you may turn into a true energy geek, like me 🙂
I recently received this question on Quora and decided to share the answer with readers there as well as on TedsTips. I hope this will save some of you from heartbreak after your winter vacation!
A primary consideration in cold climates is pipes freezing. It is very important to realize that pipes can freeze even if the home temperature is above freezing due to the locations of the pipes. I once owned a townhouse where the pipes would freeze when the outside temperatures dipped into the single digits outside, even though we were warm inside the house. How? The pipes ran up through an inside wall, across the ceiling and over to an outside wall spigot. The inside wall, at the top, opened to the cold attic, so that cold air would get into the wall cavity and freeze the pipes. This was fixed by air sealing the top of that wall cavity, but required considerable detective work to figure out. The pipes running through the outer wall down to the spigot would freeze near the spigot where the pipes were exposed to cold temperature, so this run had to be isolated from the rest of the house plumbing and drained during the winter.
These are two examples, that show potential issues that are made worse by turning down the temperature while you are away. Imagine the situation where the pipes don’t freeze when the house is occupied and the walls are warm enough to keep the pipes from freezing. Now, imagine reducing the indoor temperature, maybe only a few degrees, but enough that the cold from the outside overwhelms the meager heat coming from the house that is able to reach the pipes. This has bitten many a homeowner during winter absences.
Unfortunately, there is really no way of knowing if this will happen until it happens. This is why it is critical that you turn off the main water valve for the water supply to your spigots in your house when you travel*. The pipes may still burst, but at least your house won’t flood. When you return after winter and turn the water back on, you’ll know quickly that there’s a leak and can turn off the water and fix the leak before catastrophic damage is done. This is no exaggeration – I was called into a home that was literally FILLED with mold and had to be gutted. A pipe had burst and the owner returned after a month to find the house completely flooded.
*I was reminded (see comment below article) that you MUST NOT turn off the make-up water supply if you have a boiler for heating your home. This is very important. Boilers need available water to maintain system pressure in your radiators etc. Without make-up water, the pressure in the system can drop and the system will stop functioning.
If you plan on leaving your home for an extended period, it is always a good idea to have your HVAC company give the heating system a once-over to ensure that it is in good working order. While there, they can advise you on which water valve you can safely turn off and which you should not touch. It would be advisable to label all the valves for future reference.
Flooding is the most damaging effect, but there’s another, more insidious issue that can arise during winter house shutdowns – condensation damage and mold.
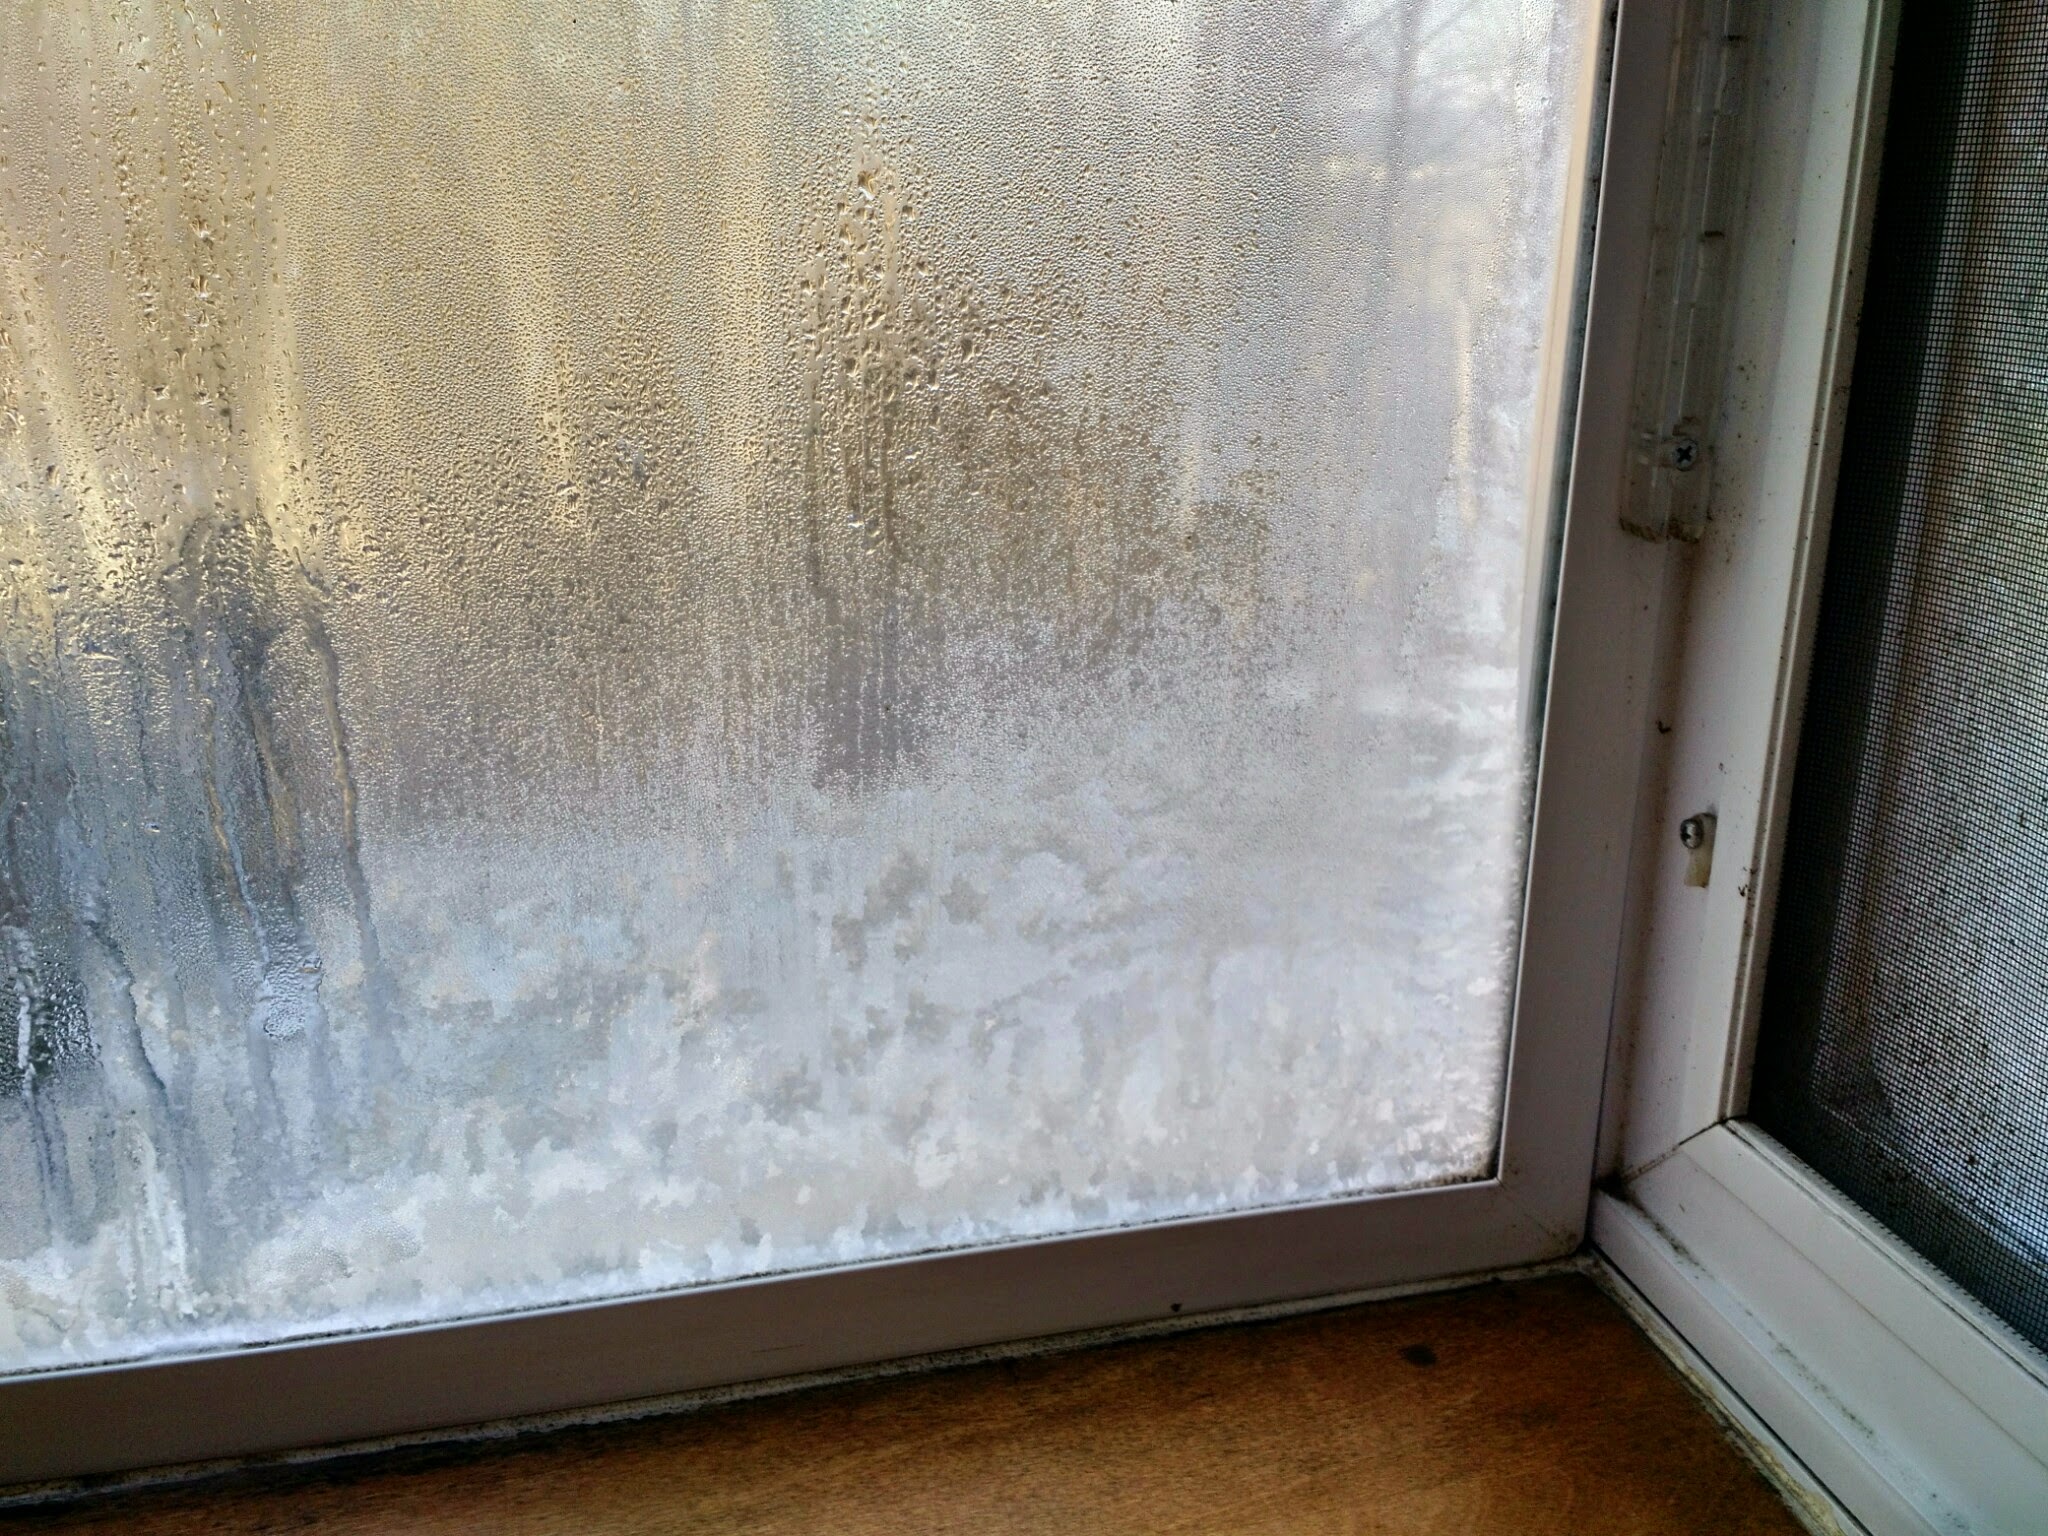
Condensation can lead to mold and wood rot
In order to understand this, I have to touch on the physics of condensation. Condensation is the conversion of water vapor to liquid water that occurs at or below what is called the “dew point.” At normal temperatures (say 70F), condensation rarely occurs during the winter because the home humidity level is modest and most of the inside of the home is above the dew point. However, even with typical indoor humidity levels, you can experience condensation on windows, because windows get much colder than the insulated walls of the house. You might have noticed this if you have curtains or insulating blinds. These help keep your room warmer but allow the windows to get even colder because they intentionally reduce the windows sapping heat from the room. When you open the curtains, you might find the windows soaking wet from all the condensation. Worse, the wood around the window, especially at the bottom edge, might be saturated with water.
Under normal circumstances, you would see this in the morning and could dry off the wood and allow it to warm up when you open the curtains. But when you are away, even if you don’t turn down the thermostat, the water will remain and can get worse every day. Over time, this will likely lead to mold growth and if allowed long enough will rot out the wood. For this reason, I highly recommend that people leave their curtains and insulating shades “UP” or “OPEN” when they are away for extended periods. You want to minimize the chance of condensation buildup and the associated potential for mold and wood rot.
Let’s continue this thought experiment. If you turn down the thermostat enough, the inner surfaces of your house (walls etc.) can get to a temperature below the dew point and, just like those windows, the water vapor in the air can condense on those surfaces. Many people have made this mistake and come home to a horrible, moldy mess! For this reason, it is extremely important to do two things:
1 – do not turn down the heat excessively. It’s impossible to tell exactly what temperature is too low, but in most climates, people find 55F-60F is safest.
2 – make sure you don’t add any moisture to the air while you are gone. This can be disastrous. For example, many homes have central humidifiers built right into the heaters. If you leave this one it raises the humidity level inside the house every time the furnace runs, likely leading to moisture problems. Turn off all humidifiers before you leave!
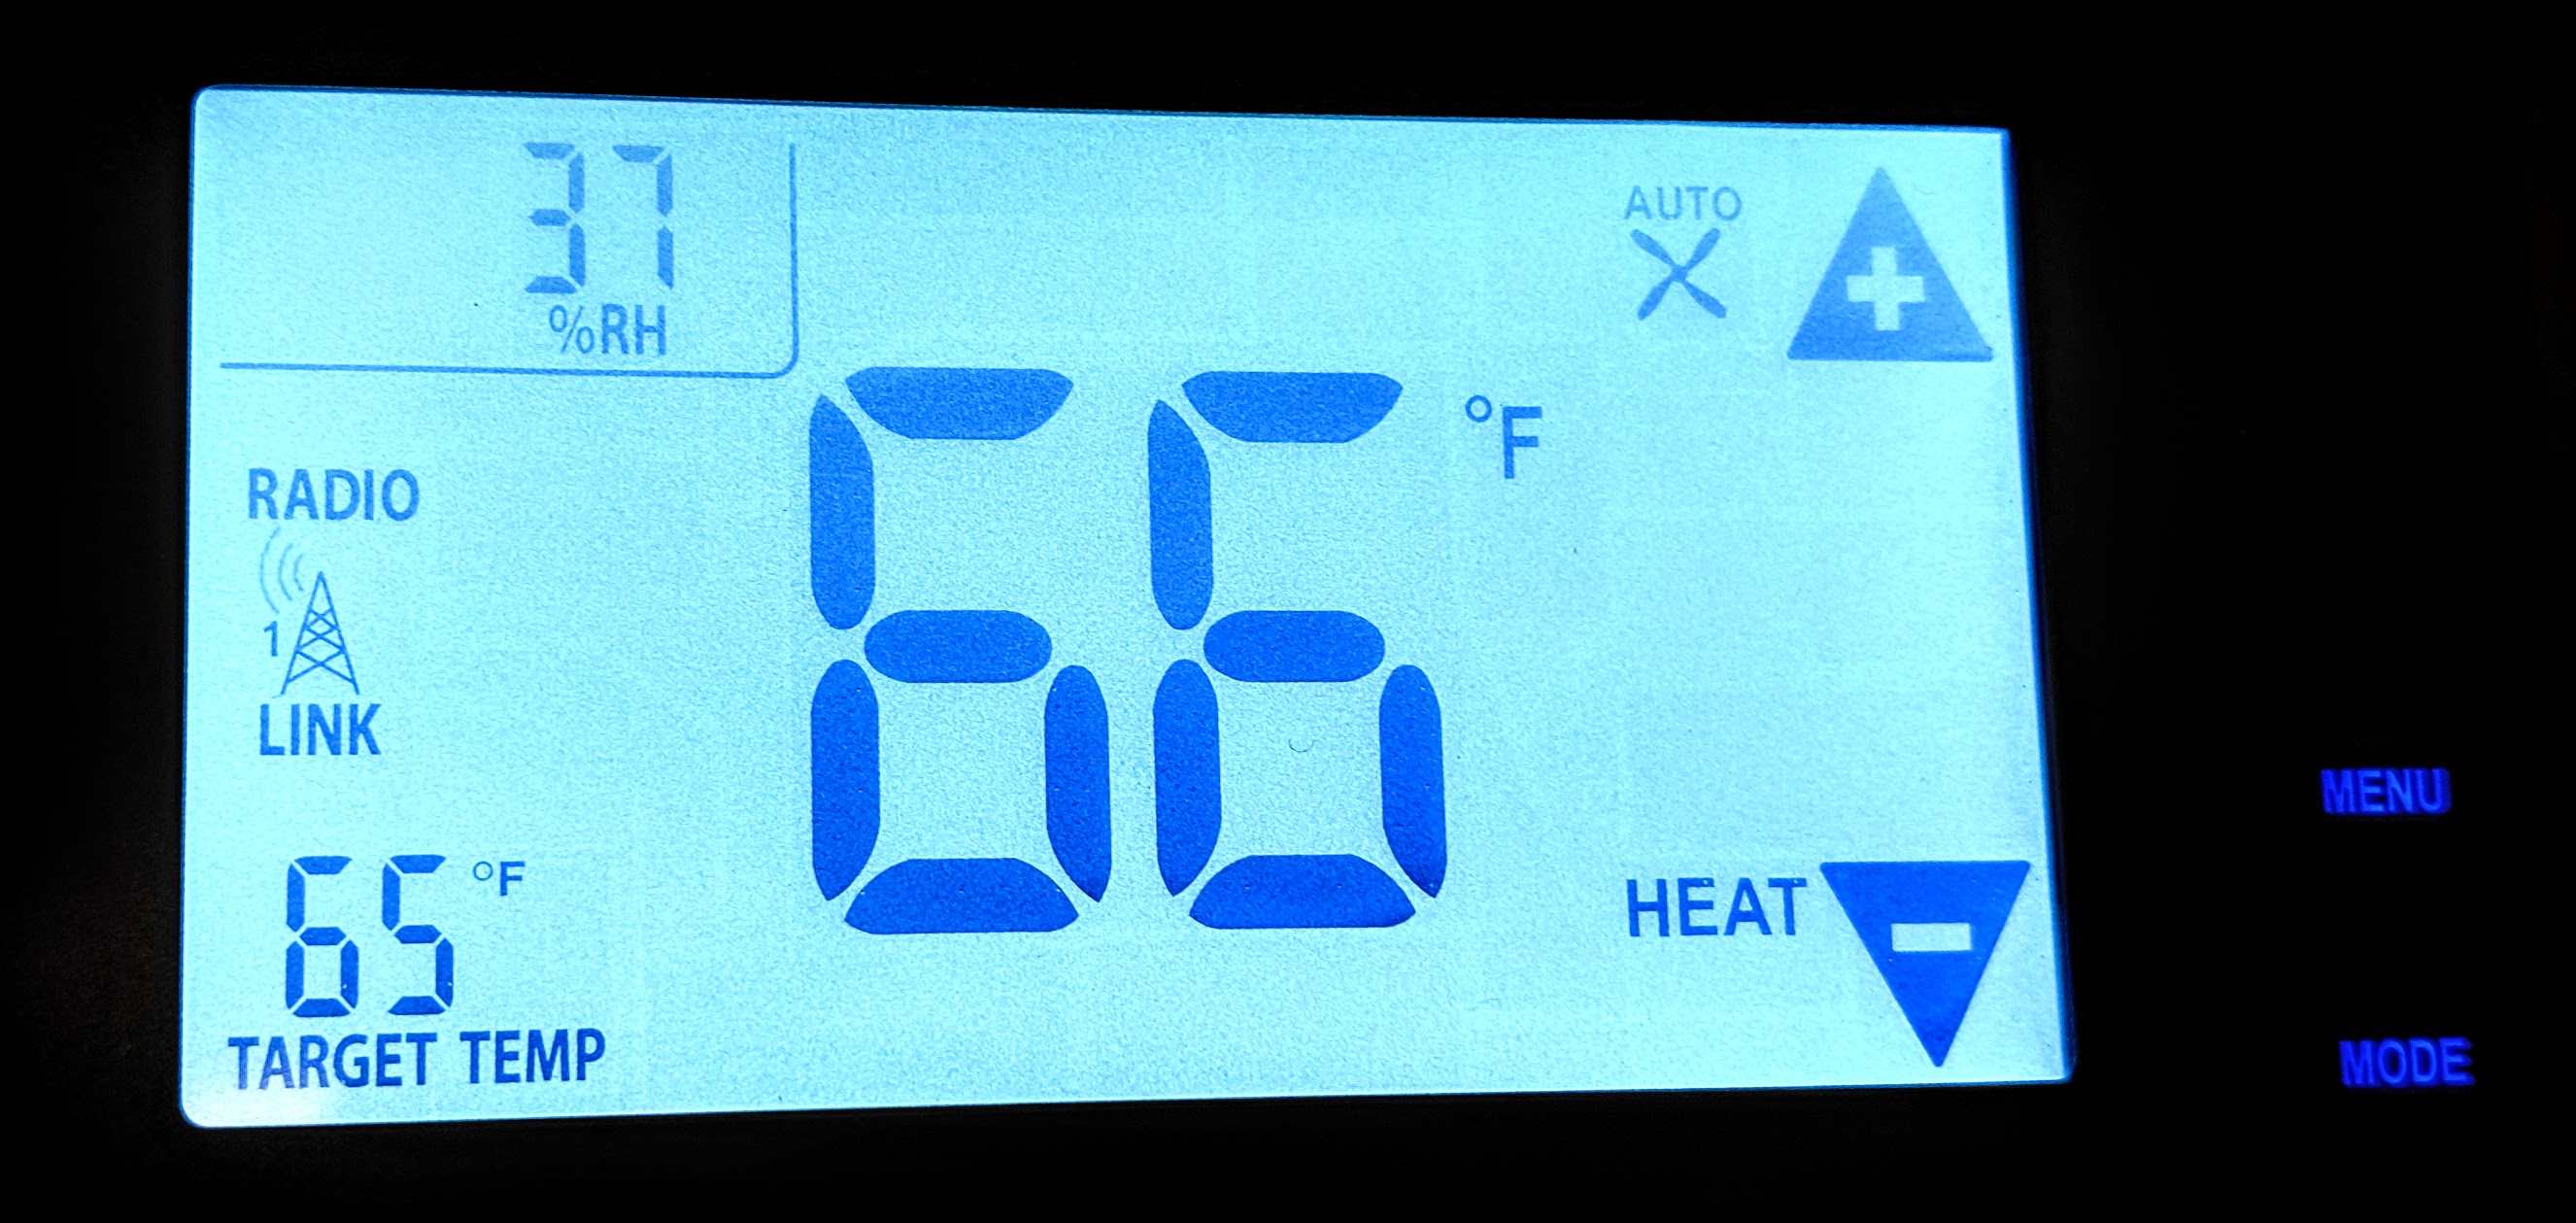
Even if you don’t have humidifiers, natural ground moisture can seep into the house through the basement, crawlspaces, etc. This is especially common in homes with dirt floors underneath. Water vapor rises up into the house, driving up the humidity. If you live in such a home, it is really important that you monitor the humidity levels in the home to ensure that they are not too high. During winter, indoor humidity levels will naturally be low, typically less than 50% relative humidity. Humidity levels above 70% are considered too high as they promote mold growth. Get yourself a humidity monitor (they’re cheap on Amazon) and see what humidity levels are. Or better yet, get an Internet smart thermostat.
Get an Internet connected thermostat that monitors temperature and humidity
These let you to monitor indoor temperature and humidity levels while you are gone. These are affordable nowadays, and can give you tremendous peace of mind. A quick daily check on temperature and humidity gives you a read on the health of your home. It’s not a guarantee, as you still might have condensation problems, but at least you can be sure that the general climate inside your home is reasonable. It will also tell you that your heating system is working. If the temperature suddenly drops to 45 even though your thermostat is set to 55, you know there’s a problem and can call in help.
Have a wonderful winter. Hopefully you will avoid the main pitfalls that have hit too many other people. A few easy steps can greatly improve your odds of coming back to a healthy home!
A reader, Adam, recently asked about the pros and cons of using LED retrofits vs. sealing recessed lights from the attic. It’s such a good question that I had to write up a quick post detailing my thoughts on this important topic.
I’ll start by saying that I have upgraded all of the recessed lights in my home with LED retrofits. This has numerous benefits over attic sealing. Prior to good LED retrofits being available, I had constructed airtight/fireproof boxes installed from the attic, so I can comment on both methods from first-hand experience.
The retrofits were easy to do, taking maybe 10 minutes each, at most. These days, high quality retrofits are inexpensive, typically less than $30.
Benefits:
Totally air-tight when installed properly with a good gasket
Energy efficient – depending on your electric cost, the light will pay for itself, especially if it’s in a high-use location, like the kitchen. Usually less than a year.
Energy efficient part 2 – you can insulate the attic properly above the fixtures. LEDs generate much less heat than incandescents. Plus, you won’t lose the heat from air escaping through the housing.
Long lasting – quality LEDs are rated to last about 2-4 years running continuously. Compare this with an incandescent which has a life only one-tenth as long. This is much more convenient (less time on the ladder is safer too!). For most uses, that means you’ll never have to replace a bulb.
The light quality of “good” LEDs is very natural if you buy high CRI (color rendering index) fixtures. This is very personal, so compare the light from different fixtures to find one you really like. I brought home several, installed them and then my wife and I could see how they looked in our own homes which is much different than the display case in the store. You can usually return the ones you don’t like, so it’s worth trying a few.
The retrofit itself is quite simple usually. Most wire into your existing fixture using a screw in connector that replaces the existing bulb.
Air/moisture leakage through recessed lights are one of the primary sources for mold and rotten roofs. By installing air-tight LED fixtures, you will potentially prevent a very expensive roof replacement and mold remediation.
Challenges with retrofitting from the attic:
A picture is worth a thousand words…
Working in attics is not fun. It’s hot, dusty and access is often difficult. This makes contractors less likely to do a good job because they’ll be anxious to work quickly and get out of there.
It can be difficult to mount the air-tight enclosure in the attic given the construction of a typical recessed light fixture. This often leads to compromises that leave gaps, defeating the purpose of an air-tight enclosure.
Incandescent lights generate a lot of heat. Some older fixtures aren’t rated for enclosure. Usually this isn’t a problem however.
Covering the fixture with a housing can make insulation challenging. Most contractors are afraid of insulating around fixtures, leading to compromised insulation.
Other considerations:
Some LED lights are not-dimmable – so make sure to buy the right type if you need them to dim.
The convenience factor of not having to replace bulbs in high ceilings is worth a lot.
Make sure the chosen fixture is the right size (4″, 5″ or 6″) for your retrofit. There are also different mounting styles that can affect compatibility.
Avoid off brands or those without a good warranty. The only trouble I’ve had with LED bulbs/retrofits are with cheap “knock-off” type. My favorites have been manufactured by CREE, which were the pioneers in LED lighting. Phillips also makes quality products.
You still have to be careful in sealing the retrofits in order to make them air-tight. They need to have a good gasket and be firmly seated to the ceiling.
The thermal image, below, shows a huge amount of air leakage around a so-called air-tight recessed light fixture. As with all things in home construction, installation is key!
For best air-sealing, I have used foil-tape to seal the holes inside the existing fixture. Some people claim you need air flow through the fixture for cooling but the fact that these fixtures are built to be air-tight negates this argument.
Almost everybody gets thrown off by this, but I moderate comments to avoid spammers. The downside of this is that you won’t see your comments post until I’ve had a chance to review and approve them. Sometimes this can take days (sorry!) Thanks for your patience.
Virtually every auto manufacturer has pledged to electrify their product lines before 2025. This could mean making all their cars hybrids, like the Prius. But many are mentioning at least some of those cars will be “plug-in” hybrids or fully electric vehicles.
In previous posts, I’ve discussed the great benefits of pure electric vehicles – great drivability, simplicity of drivetrain for minimal maintenance, zero exhaust pollution, and never having to go to the gas station. I’ve also written about the difference between the types of electrified vehicles, but I haven’t done a deep-dive into plug-in hybrids. In all likelihood, you’ll be seeing many vehicles with this label in dealer showrooms, but what exactly do they mean? Hopefully, by the time you finish reading this post, you’ll understand and be able to purchase your next vehicle, confidently knowing exactly what you’re getting.
Plug-in hybrids are hybrid vehicles with larger batteries and a switch that allows you to change them from gas-electric propulsion to electric only. “Great!” you might think – “best of both worlds! Now I don’t have to worry about the range of the batteries since I can always switch on the gas engine.” However, all is not so rosy. As with everything in life, there are compromises. Continue reading →
There’s been a lot of talk and press coverage about electric vehicles the last few years. Tesla, Elon Musk’s electric car company, has generated huge excitement with it’s sexy, high performance cars, but their price has put them out of reach of most consumers. The Tesla Model 3, to be released in mid-late 2017, hopes to change that however, giving you a 200+ mile range electric car for under $40,000.
Tesla isn’t the only game in town. Chevrolet released their sub-$40k Chevy Bolt at the beginning of 2017, and this compact SUV shaped electric vehicle has won accolades from all the automotive press, setting the standard for high range (200+ miles on a charge) vehicles.
These two are just the start of a flood of EV’s hitting the market. Virtually every auto manufacturer has promised a variety of electric vehicles – great news for consumers, but also potentially confusing.
In this article, I hope to arm you with some useful information so you can decide if an electric vehicle is right for you. Continue reading →


 There’s been a lot of talk and press coverage about electric vehicles the last few years. Tesla, Elon Musk’s electric car company, has generated huge excitement with it’s sexy, high performance cars, but their price has put them out of reach of most consumers. The Tesla Model 3, to be released in mid-late 2017, hopes to change that however, giving you a 200+ mile range electric car for under $40,000.
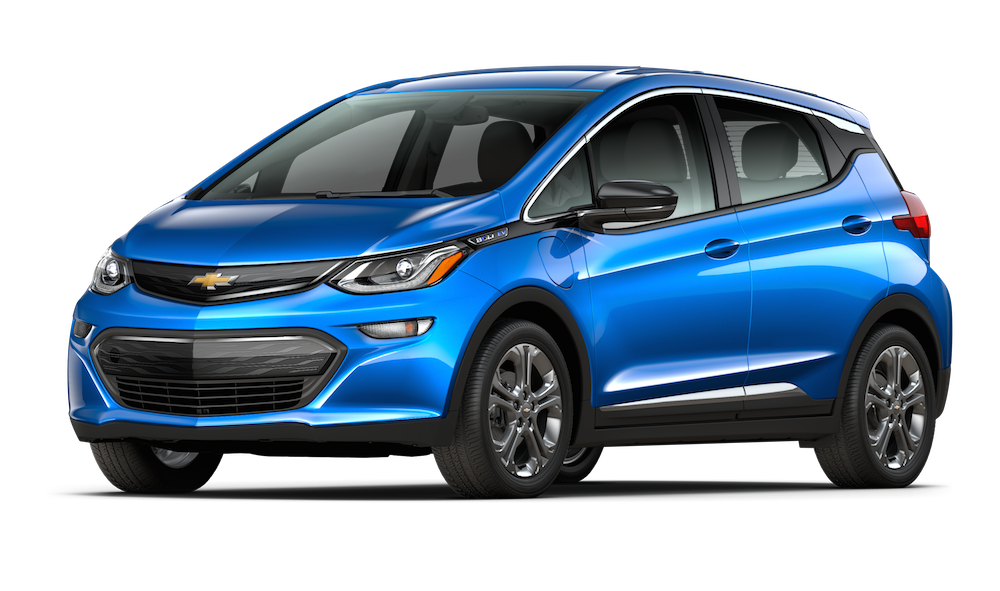 Tesla isn’t the only game in town. Chevrolet released their sub-$40k Chevy Bolt at the beginning of 2017, and this compact SUV shaped electric vehicle has won accolades from all the automotive press, setting the standard for high range (200+ miles on a charge) vehicles.